

Introduction:
After weeks of trying to think of a way to fit a good sized intercooler in a 205 I came to the conclusion that there just is not enough space, any good sized front mount will need loads of induction piping (extra lag) and modifications to the front of the car, as I wanted to keep the car completely standard looking I gave up on the idea and started to think. Chargecoolers were the obvious solution as they so not take up as much space as intercoolers and are fair more efficient. the only problem with them is the cost (over £500 for a new one). Also they are a fair more complex installation with the water pump, hoses, pre-radiator header tank, than a simple intercooler. Anyway, I decided to start looking to get 2nd hand one anyway as I like a challenge!
Finding and buying a chargecooler:
2 weeks later and no luck, the problem being that hardy any production cars left the factory with chargecoolers (probably down to the cost), I was about to give up when I discovered that early Subaru Legacy’s were equipped as standard with chargecoolers! Great I thought and I began e-mailing every Subaru Breakers on the web. Unfortunately getting hold of one seemed to be a problem they are quite a popular modification for Impreza drivers, but in the end I managed to find a breakers that would sell me the entire kit, chargecooler, water pump, pre rad and all the pipes & clips for £100! I phoned the guy 10min after getting the e-mail and it arrived the next day!
This is what I got for my dosh along with pump and the radiator:
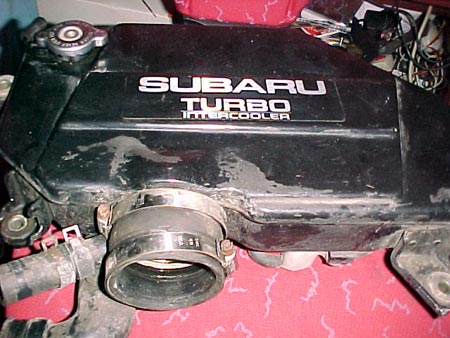
2nd hand Subary Legacy charge cooler
Planning:
As with most projects, a degree of planning can never go amiss. I sat down with a pen and paper and started to sketch ideas and trawl through the web looking for information. I almost immediately dismissed the idea of using the std legacy pre-radiator it was in a bit of sorry state, I also read on the Subaru forums that the biggest restriction in the legacy chargecooler system was the size of the pre-radiator so again I had to come up with idea's for fitting another radiator. The best solution seemed to be to fit another std radiator, apart from the annoying top hose connector there is no reason why they will not sandwedge together perfectly, plus if a single one of these can provide enough cooling for the entire engine then I am sure another should do a good job of keeping the chargecooler coolant nice and cold, another bonus of course was that I actually had a spare one lying around, so the cost would be nothing (always a good thing!). Next big headache was finding a place to actually put this beast of a chargecooler, well only one thing for it, battery will have to go in the boot and the chargecooler can sit in the battery try with the water pump mounted nicely beneath the left hand wing. Of course one thing you realise when doing stuff like this is that things never go to plan so the I just had to give it a go and see!
Twin Radiators and Fans?!
Why not I thought, I always had problems with temperature sitting in traffic and since I no longer had my intercooler/oil cooler in the way, I can fit and additional fan and have the dual fan set-up 205 diesels have. Off to the scrap yard again and I came home an additional fan and plastic shrouding for £10, one problem solved.
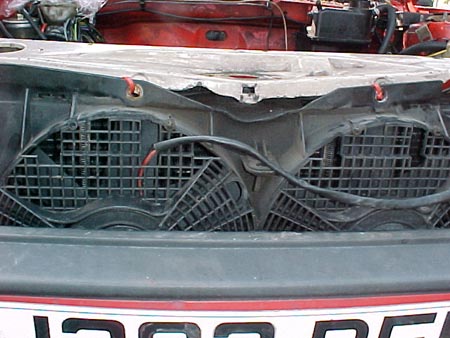
fan shrouding with twin fan setup
The next challenge would be to fit the two radiators together. My first idea was to cut the top pip off completely and somehow fit another hose connector on the side rather than the front and have the two sitting together in the same position. I later decided that this was not a good idea as I would lose all the strength of the original hose connectors and given that I am sure there will be some movement in the water hoses it is doubtful anything I could make would last very long as the radiator ends are plastic. My next idea was to stager the radiators slightly, only problem with this was that as the top connector on the front radiator sticks out forward then at a right angle towards the left of the car, this meant that by the time I had a hose on the end I had moved the engine radiator too fair left to fit the bottom hose on. It seemed some cutting and Araldite action seemed to be in order! I cut the right angle down to almost nothing and found a plastic plug that would jam it perfectly, I applied plenty of araldite and hammered in the plastic plug, perfect. The engine radiator would sit perfectly in front (nearest the engine) of the chargecooler radiator. Next I had to think of a way to join the chargecooler hoses to the ends of radiator as the sizes were completely different, radiator ends being almost twice the size of the chargecooler hoses I had. In the end I had to dill a out the front of the top connecter anyway as it was naturally blank so I cut one of the ends of the original chargecooler and carefully drilled the plastic end until it would just about fit, I then got the Araldite out and hammered the bugger in. 12 hours of drying later, I was left with a rock solid top connector that was exactly the correct size for the chargecooler water pipes! 1 down 1 to go!
The bottom hose as so fair proved to be more tricky, I have bodged it at the moment by building up different sized rubber hose onto a plastic joiner to I can fit the two together, I will think of a more permanent solution soon! ![]()
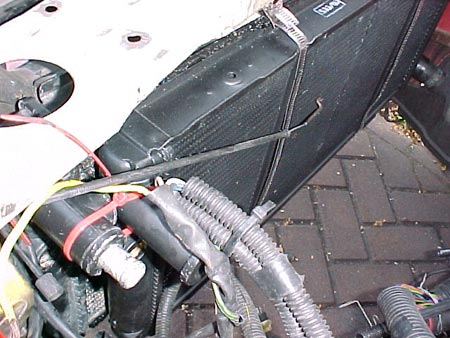
modified top radiator hose connector
To physically join the radiators together, I used self build jubilee sets and made up some the correct size, I also made some brackets out of some sheet steel to hold the lower part of the radiator firmly in place.
A thin coating of silicone was also applied to the edges of the two radiators to make sure they do not score against each other.
Pump time!
I always thought this would take ages but I was wrong, finding a place for the pump was easy as you have so much unused room in the bottom right of the engine bay (from facing the car). I used the original Subaru mounting brackets (they are rubber lined to stop vibration) and some stainless steel bolts, washers and 1 oil cooler mounting bracket and my water pump was secure in the bottom left of the engine bay.
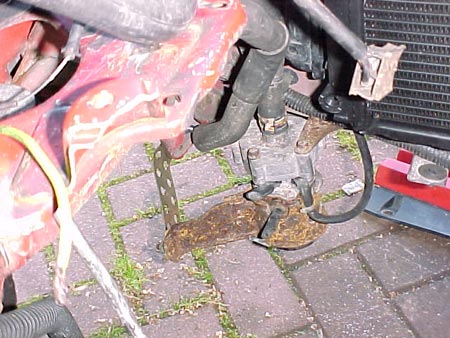
electrical water pump for the chargecooler
I plumbed everything in and gave it a go, it worked, no leaks, quiet as a mouse!
To be continued...