

Introduction:
The mirrors on my '87 (phase 1) 205 GTI 1.9 were badly refinished by one of the previous owners, and were rattling quite badly, this 'how to' details how to prep and paint the mirrors to match the body colour. This procedure will likely take about 24 hours in all, allowing for drying and hardening time, but only about twenty minutes to remove and strip the mirrors, same again to replace them when done.
Materials needed:
1. sand-paper or glass-paper, 80, 120 and 240 grit
2. wet'n'dry paper, 400, 600 and 1200 grit
3. suitable primer, I used grey as my car's silver, zinc oxide (red) might be better for red cars, I used about 300ml
4. suitable paint, again I used about 300ml
5. lacquer, optional for flat colours but needed for metallics, used about 200ml
6. some string
Tools needed:
1. screwdrivers, one long flat blade and one philips
2. thin nose pliers
3. spanner, open end or ring 15mm, or adjustable will do
4. optional - site lamp or similar bright light source
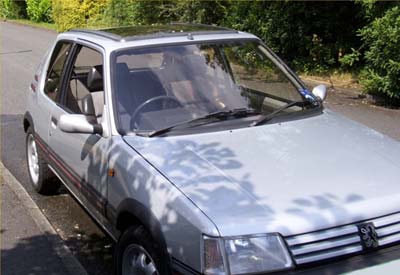
colour coded mirrors change the look of the car
The job:
1. Strip mirrors from car.
- remove the rubber cap from the end of the control lever inside the car
- undo and remove circular locknut from the control lever assembly using thin nose pliers or similar
- prise off the corner trims inside using a flat blade screwdriver, these are surprisingly tightly fitted, and have three locating dowels, two both below and to the left and right of the control lever assembly, and one directly above
- undo and remove 3 (allen) screws, while supporting the mirror from the outside.
- withdraw mirror and corner assy
2. Put the car somewhere dry, or cover the hole left!
3. Strip mirror assemblies:
- remove three philips screws from the back of the corner plate
- remove rubber boot (skip to 11 if you only want to stop them rattling)
- (hardest bit of the job) disconnect the control cables from the control lever assembly by using the thin nose pliers again, pull the outer sheath down and disengage from the contoller lever assy, in a similar way you might disconnect a brake cable
- NOTE WHICH WAY ROUND THEY ATTACHED, mine were coloured so this was easy
- remove, or in my case drill out, the screws holding the glass pivot mounts from the underside of the mirror casing
- withdraw glass and workings from mirror casing
4. Prep the casings and the corner bits using the 80, 120 and 240 grit paper in ascending order (descending order of abrasiveness). This bit is crucial, the quality of workmanship here will have the biggest impact on the finished job.
5. Be sure the items to be painted are clean, dry and free from dust or any polish or similar, and suspend them on string - I put some of the screws back in the corner section, the two closest together, and hung it over a piece of string tied horizontally. Mask up the hinge assy of the mirror casing, and suspend it on string by the bit you masked. If your string is tied horizontally the bits won't spin. I find having the items to be painted suspended at about eye level makes the painting much easier. Rig up the site lamp as available at this point trying to locate it above eye level to minimise shadows on the items to be painted.
6. Spray the primer in even strokes from about 8-10 inches away, don't worry about coverage, too much will run and you'll have to rub down and start again. Build up the coats at 15 to 20 minute intervals until the coverage is even, keying (roughening and flattening the paint surface) in between with the 600 paper. Note, I always use the wet'n'dry paper wet - get a suitable sandwich box or similar, and and _a drop_ of washing up liquid to about half a pint of water and dip the paper in this intermittently when keying the paint.
7. Spray the colour coats, as above, but this time use the 1200 paper between coats. Halfords primer/paint takes about 20 mins to dry to sufficent hardness for keying.
8. Compulsory for metallics, optional flat colours - apply a few coats of lacquer, as above.
9. Assess quality of workmanship. Any evidence of paint runs must be removed using the wet'n'dry, or by going back to stage 4.
10. Re-assemble the mirrors in reverse order of stripping, noting the control lever assy only fits one way round into the corner piece due to a chamfered edge. At this stage it's a good idea to protect the sharp edges of the mirror glass with some kitchen paper or a duster or similar to stop it damaging the newly painted housings.
11. Before refitting the boot, take the time to tighten the hinge bolt a couple of turns as appropriate to stop them rattling (this is actually why I started the job).
12. Re-fit mirrors to car as reverse of removal, noting in particular that the triangular corner sections outside are seating correctly. You might want to take this opportunity to stuff some draught excluder or similar behind the corner peice to cut down on high speed wind noise.
13. Step back and admire.
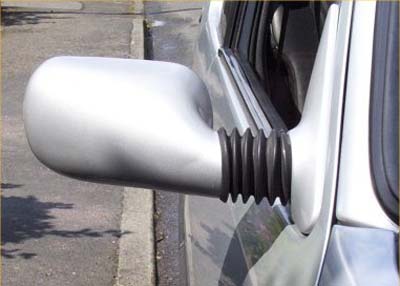
quality of workmanship close up ![]()