
Introduction:
This is a work sumary of my methods, not a professional guide. I will accept no responsibility for any f***-ups!
Having tried various other products including baby oil, autoglym bumper snot, and T-cut bumper and trim restoration, I was bored of having to re-apply the products so often to maintain a decent effect. So I thought I’d invest a bit of time and money and do it properly, hoping that the results would last for years rather than months. That bit is yet to be revealed, but it looks amazing if a bit shiny.
Removing trim:
Step one was to remove all the trim that I intended to spray. First came the sunroof surround trim (obviously only applicable on models with sunroofs). The way that I removed the side sunroof trim was to stand at the back of the car and pull towards me firmly. It is clipped into the front sunroof trim, which runs perpendicular to the side trim, so you will need to pull quite firmly. When you get it off you will see that torx screws secure the trim down to the roof.
The front trim was a bit of a mystery cause I couldn’t see anything until it was off. I just pulled it away from the front of the car, and there were a few cracking and snapping sounds, but it came off. A couple of bits of plastic broke, but there is a metal s-clip holding it down too. Since it is attached to the side trim, it goes back on fine as long as you push it down properly. So, for the sunroof trim I didn’t need to replace any clips or anything.
The side trim was a different story!
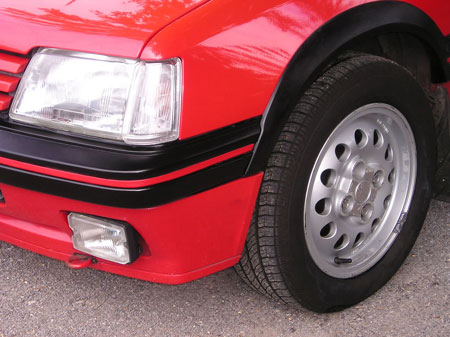
First up was to remove the red metal inserts that slide into the plastic retaining clips. These were ok, and despite a few kinks in the metal, came out properly. Simply slide the red inserts making sure you are pulling the closed end towards you not the open end. Clean these with white spirits to buff them a bit then wash them off and dry. I didn’t spray these but it could be an option.
With all the red inserts removed, the plastic clips that held the red inserts on are revealed. These simply slide off horizontally– remember the position that they were in on the car. None of these needed replacing on my car. The only thing now holding the black trim on should now be metal anti-rattle clips. These will not yet be visible. The side trim slides up onto these clips and is kind of locked in by them, so slid the black trim down firmly so that it is released from the anti-rattles. Most of these were completely rusted to buggery on my car, so I suggest that you buy new ones all round before removing the trim. They were like 40p each from Peugeot and they will tell you how many you need.
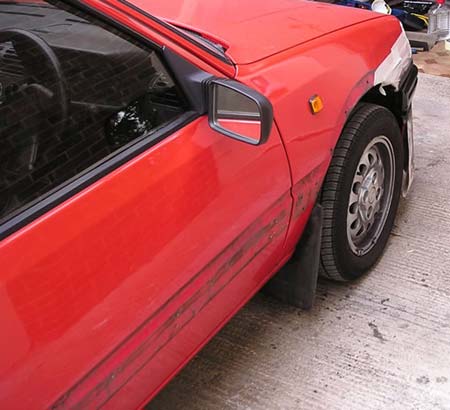
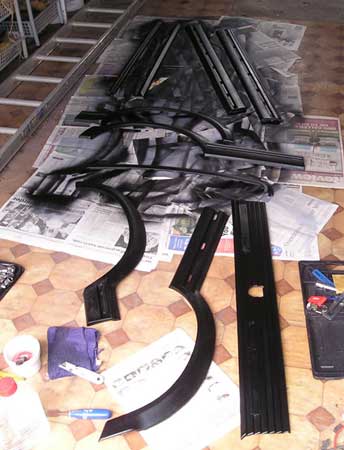
side and wheel arch trim removed
I then removed the wheel arch trim. These were very stiff and you have to basically resort to thuggery to remove them. The barbed plastic popper clips (similar to the ones used on the rear wiper motor cover, maybe even the same) will mostly break, so get new ones of these as well. There are two different types of these plastic popper clips though, so make sure you have new ones. There are some grey ones with a quadrilateral-shaped head. Before you try and remove these however, get under the wheel arch and prize off what should be metal washers which act as retaining clips for some hard plastic guides that go through the wheel arch holes. I didn’t know these were there so it made it a lot harder for me.
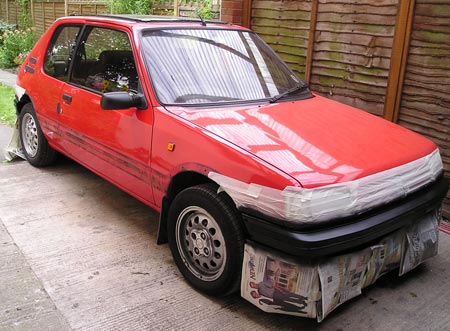
front bumper masked off
Next was the tailgate trim. I was expecting this to be a complete pain, but it wasn’t. Remove the badges – 205, GTI, Peugeot etc., then you will see some thinner anti-rattle type clips which slide onto some more metal rivets, holding the tailgate trim against the car. Slide these off (you will most likely have to get new ones) and push the trim down and try and pull it towards you at the same time. The trim has ridges on the side and bottom that help hold it on.
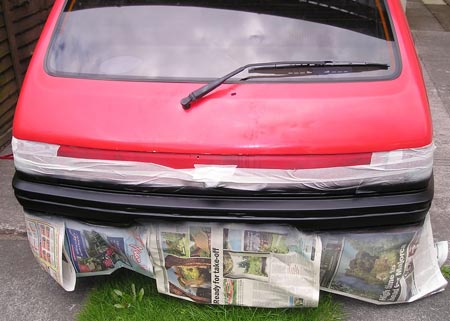
tailgate trim removed and rear bumper masked off
Ok, all your trim’s off. I decided to spray the bumpers in situ having heard numerous horror stories of rusted bolts and grinders. Get some masking tape and lots of newspaper, and mask up the front and back of the car, leaving the bumpers. I also put a thin strip of masking tape over where the red inserts run, because otherwise you may have some sticky plastic retaining clips on the bumper. There is no need to remove the red plastic insert retaining clips on the bumpers, but you need to on the side trim.
Inventory:
The list of things i had to buy:
- Halfords grey plastic primer (approx 5 cans)
- Halfords black plastic bumper paint (approx 5 cans)
- Halfords universal lacquer
- 1200 grade wet and dry
- 1500 grade wet and dry
- White spirit (to clean bumper prior to priming)
- Newspaper
- Masking tape
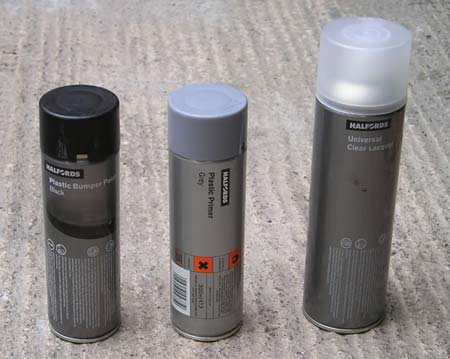
Halfords spray cans
Be careful with the cost. Although all this stuff adds up to a fair amount, and it may be cheaper to buy new trim, it won’t be to buy new trim and bumpers. Plus they probably look blacker than new trim!
Spraying:
I’ve never sprayed anything before, literally. But plastic is a lot more forgiving than metal, and unless you fall asleep mid-stroke, you aren’t going to muck this up.
Preparation - Preparation is so the key to this! Remove all evidence of previous botched attempts at restoring your bumpers and trim. This will involve sanding and white spirits most likely, unless your dad has a shot blaster or something. Smoothing the bumpers and trim right down would look stunning, but will take ages unless done by a professional. The trim must be very clean prior to priming (if you want it to last, use primer), so use white spirit to clean the surfaces. Next get some 1200 wet and dry and rub all surfaces so that the primer has something to “key” to.
Priming - Take your grey primer and apply four (ish) coats leaving 15 minutes between each coat. Spray at a constant rate, making sure each section has a good covering.
Painting - Having left the last coat of primer to dry for 24 hours, smooth the primer down with some 1500 wet and dry, using plenty of water. When it’s dry, start spraying with the black bumper paint in the same manner as you did with the primer. Again, apply 4-5 coats.
trim sprayed and ready to be sanded and lacquered
Sand - Before applying the lacquer, it is necessary to sand the paint (having left it to dry for 24 hours again) in order to remove the shiny finish and get it looking matt. Use 1500 wet and dry with lots of water.
Lacquering - Some think this unnecessary, but since my main stipulation was that the results should last a long time, I decided to lacquer the parts so as to seal them in from the elements as effectively as possible. I didn’t spend very long sanding down the matt finish prior to lacquering, hence the more shiny effect! Maybe I’ll have another go in the future. Apply two coats of lacquer, leaving 15-20 minutes between each coat.
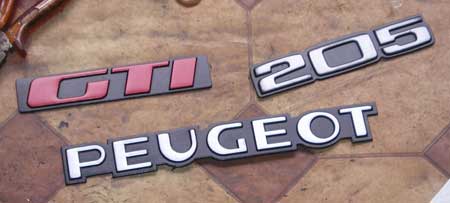
clean up the badges and lacquer them
Putting the trim back on:
It’s probably best not to put it all back until the lacquer has dried for 24 hours in case it rains. But if the car is covered, you can now put all the trim back on, replacing clips etc. where necessary. Be careful when putting back the red inserts; slide them onto the rubber clips. The rest of the trim should just pop back on generally.

trim and inserts back on
The sunroof trim was a bit of a pain, but it will stay on if you push it in properly.
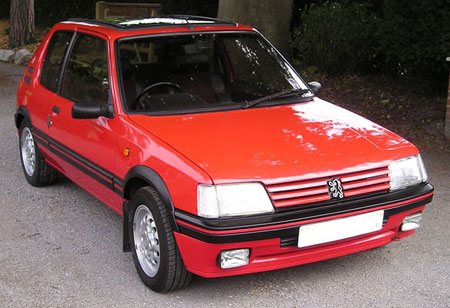
it gave a "new car" look to the car
Rub off any over spray using a rubbing compound! I have also washed it and used Wonder Wheels to clean up the alloys - made a HUGE differece! That's it - stand back and admire!
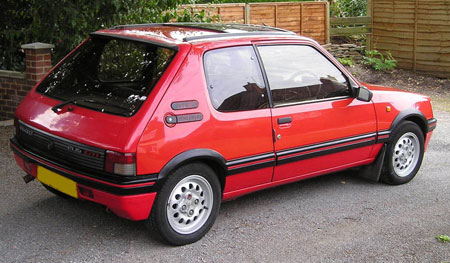
definately a job worth doing!
