I had heard of these beams fitting 405's without issues several times but not read what differences there were between them, and having worked on a few they did look largely identical.
Cue my brother having a 1989 Phase1 GRD with some quite epic camber issues, so off we go to one of my favourite scrapyards Harry Bucklands just outside Cheltenham, took about half an hour to remove the beam from the van, luckily it was minus its rear wheels and partially on some wheels under the sills already.
8 bolts 2 handbrake cables and two brake pipes and its off, two T40 torx bolts fore and aft of the main front mounting bush, and a pair of 16mm head bolts on the rear bushes (or if you have one, a round section 100mm long T40 bit will remove the main mounting bush bolt, the standard hex type will not fit through the hole)
Do beware, these beams are significantly heavier than the smaller cars! it is not a one man operation to carry it out of the yard, especially if said beam is on one of the last cars furthest away from the carpark, some 200 yards away!
The main differences we have found are in the brake pipe and handbrake cable brackets, though the holes are all present and tapped, but will require cleaning out, also the bolts securing the rear mounting bushes on the 405 are M8, the van's use M10.
Two ways around this, either retain the 405 mounts and drill the holes out to 10.5mm, or take the van bushes with you.
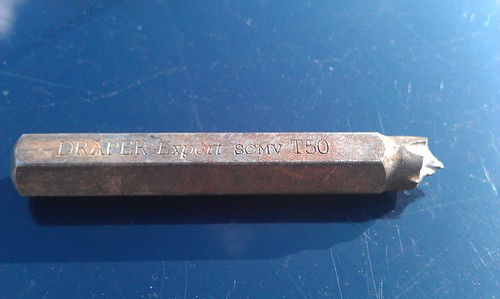
Pictured below are the rear bush mounting holes, and the access hole for the main bush to body bolt, which I drilled out to 13mm to allow use of a standard hex section torx bit, of which I couldn't actually track one down in the Newport are at all.
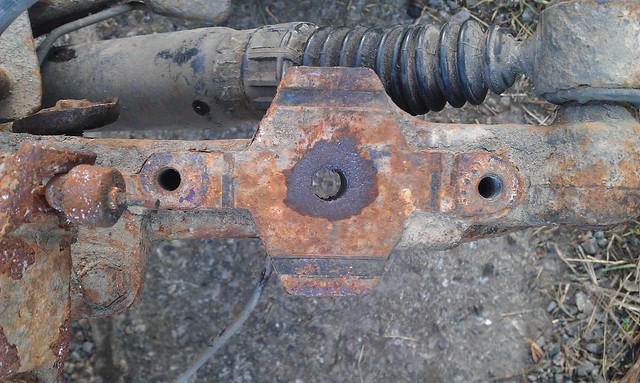
The other way to sort this is to leave the bushes attached to the body by the single T50 headed bolt, making sure you get them square, and offering the beam into place and fitting the two M10 bolts.
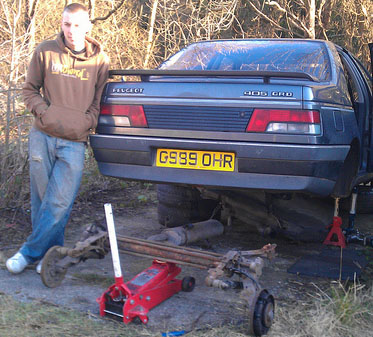
Here is my brother once we finally got his beam removed, the front Torx bolts were proving highly troublesome, snapping the head off one, then needing to drill the head off and remove the caged nut which is under the seat bench, the fuel tank does need dropping to make things easier, however is a pretty straightforward task of 4 bolts and a few hose clips.
![]()
Couple of new hoses at £4 each, and handbrake cables at £7 each, bodge up the load compensator spring, as half of it was missing...
tadaaa!
The car originally ran pressure limiters incorporated into the rear cylinders and Girling shoes, but seeing as one was leaking, shoes on the other side were buggered, we went with the van setup of a compensator and bendix shoes, re-using half the lines and making up one or two.
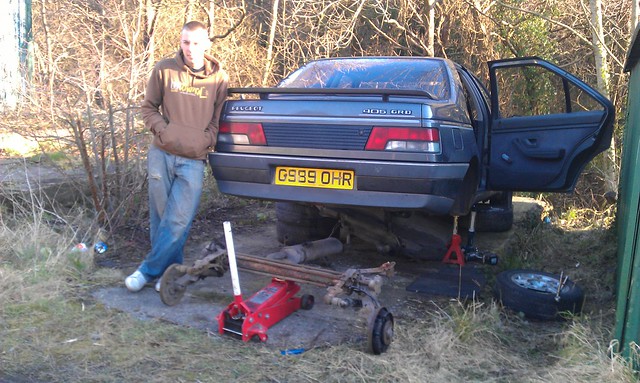
As you may notice, there is something of an issue with the rear ride height, checking the Haynes manual figures the sills should actually be level at the jacking point holes, this currently is 92mm higher, hence with hindsight we would have altered the ride height before fitting.
The do nor vehicle was only a 600 model with a DW8 engine, so only has 20.3mm torsion bars not the stiffer 21.3mm items used on the 800 kilo payload variant, this is still larger than any 405 uses.
another thing to note is that on non abs cars using 20.6mm master cylinders your pedal will be longer, due to the van using 22.2mm cylinders rather than 20.6mm, an ABS MC of 22.2mm has been purchased to solve that, if you want to you can use a 23.8mm van item.