Jump to content
  • Welcome to 205GTIDrivers.com!

    Hello dear visitor! Feel free to browse but we invite you to register completely free of charge in order to enjoy the full functionality of the website.

Sign in to follow this  
pugpete1108

[car_overhaul] Reshell, Restore And Rebuild

Recommended Posts

pugpete1108

yeah tbh mate i'm in no rush for the paint job. gonna use the graphite doors for now and matte up the bonnet, spray the lower rear quarter and it will all be good.


its gotta be done before the summer but its getting too cold to do much now outside.


whats up with the red one then?

Share this post


Link to post
Share on other sites
james_pug

yeah tbh mate i'm in no rush for the paint job. gonna use the graphite doors for now and matte up the bonnet, spray the lower rear quarter and it will all be good.


its gotta be done before the summer but its getting too cold to do much now outside.


whats up with the red one then?


Puffery next year?


Red one needed a few bits before a not and a few odd bits I wanted to tidy up- new lower crossmember,rad, headlights, fan cowling, grill backing,exhaust manifold gasket, new cat and centre section + more that I haven't got to yet, I've worked every day since the start of November though and don't have a day off til the 16! So I haven't touched it in about a month.

Share this post


Link to post
Share on other sites
pugpete1108

Puffery ? Pugfest yeah :)


I'm going in a 205 next year or else

Share this post


Link to post
Share on other sites
cRaig

little update:


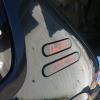
done loads but not had chance to get any pics, i did however get my rear panel redone today and the refurbed badges stuck back on.


looks pretty good apart from the tiny crease in the panel which bh is barely noticable.


How are you going to hold the boot panel on? Because the little recesses behind the badges are where the clips that hold it on sit. A bit tricky to fit them If youve already stuck the badges on! :s Or are you planning to glue the panel on?


Other than that, looking good!


Craig

Share this post


Link to post
Share on other sites
pugpete1108

i have stuck it on as i kind of realised after i stuck the badges on that i needed to get behind for the trim clips :ph34r:


lives and learns :lol:

Share this post


Link to post
Share on other sites
cRaig

Heh, weve all been there at various stages :D

Share this post


Link to post
Share on other sites
pugpete1108

Heh, weve all been there at various stages :D


i should have clicked really as i removed the panel not too long ago :blush:

Share this post


Link to post
Share on other sites
feb

little update:


done loads but not had chance to get any pics, i did however get my rear panel redone today and the refurbed badges stuck back on.


looks pretty good apart from the tiny crease in the panel which bh is barely noticable.


DSC_0890.jpg


DSC_0887.jpg


refurbed badge:


DSC_0884.jpg


Very nice.

What did you use for the silver lettering (spray cans, brush or marker) and how did you manage to mask around the letters seeing as the area is too tight/letters are curved?

Edited by feb

Share this post


Link to post
Share on other sites
james_pug

Puffery ? Pugfest yeah :)


I'm going in a 205 next year or else


Lol poxy auto correct.

Share this post


Link to post
Share on other sites
pugpete1108

Very nice.

What did you use for the silver lettering (spray cans, brush or marker) and how did you manage to mask around the letters seeing as the area is too tight/letters are curved?


i was kinda hoping someone would ask that :)


it went like this:


primer whole badge

steel wheel silver whole badge

laquer whole badge


leave for laquer to fully dry (few days)


couple of coats of matte black all over, then before it fully goes off (couple of hours max) using a cotton bud soaked in thinner i removed the matte black from the tops of the letters.


then i left it for a few days then buffed up the silver bits.


the gti badge i just left in red oxide instead of the silver as i didnt have any red


twas a fair bit of hastle tbh but worth the effort for something a bit different.

Edited by pugpete1108

Share this post


Link to post
Share on other sites
pugpete1108

well after having a good look over the graphite doors i decided they were too ripply for my liking and seeing as i am removing the trim and smoothing them out i have to weld up and fill the bottom half anyway i decided to use the set of matte doors from my old shell which ar very straight and rust free and also already smoothed out. :)


i roped the old lady into helping today much to her disslike (hence the blowing off of my ratchet :blush: )


it looks like a real car now yay:


IMG_0138.jpg


IMG_0139.jpg

Share this post


Link to post
Share on other sites
pugpete1108

got me some nice fancy underlay for the carpet from my local carpet right :lol:


its 12mm coated foam stuff so wont hold water and should keep it shape fairly well plus it was only £15 for 4sqm of it.


i glued it down with some spray contact adhiesive and it bends and fits well to the contours of the car.


IMG_0141.jpg


IMG_0142.jpg


also got the slam panel fitted along with the bonnet catch and mended the broken release cablke and it all works lovely and get me freshly painted grill fitted too.


IMG_0147.jpg


carpet back in:


IMG_0146.jpg


i can now start tidying up the wiring and fitting the interior back in.

Edited by pugpete1108

Share this post


Link to post
Share on other sites
pugpete1108

got the passemger door flatted and cut back today, after a half arsed polish it looks ok apart from being slightly off shade and mega blotchy (learnt from my mistakes for the drivers door).


went ahead and put the windows and stuff back on anyway, will be giving the car a good machine polish when its all done.


passenger:


IMG_0180.jpg


looks worse than this in the flesh too <_<


IMG_0178.jpg


drivers side needs flatting and polishing in a week or so along with the arches, does look much much more uniform and acceptable than the passenger one:


IMG_0177.jpg


??:

IMG_0181.jpg

Share this post


Link to post
Share on other sites
damien

sarah showed me a pic of it early, she is coming along very nicely and the wheels look good too

Share this post


Link to post
Share on other sites
pugpete1108

Cheers mate, shame it don't look so good in the flesh ha


Yours running yet?

Share this post


Link to post
Share on other sites
dcc

I am not sure if im talkign out of my arse when I say this, but isnt that carpet underlay a bit... Dangerous?


My underlay was a bit damp so I have taken it out to dry over the next few days/weeks (I cant drive the car due to personal injury at the moment so not too bothered ;/ ), But I did notice it had melted itself to the exhaust tunnel, not sure if carpet underlay will take the temperatures which will be there.


If I am wrong please tell me, as I would like to put some underlay down but not too sure about the above point!


Thanks

Dan

Share this post


Link to post
Share on other sites
damien

Cheers mate, shame it don't look so good in the flesh ha


Yours running yet?


to cut a long story short ..... nope


ive got man flu at the moment anyway so im stuck on the forum/xbox

Share this post


Link to post
Share on other sites
pugpete1108

I am not sure if im talkign out of my arse when I say this, but isnt that carpet underlay a bit... Dangerous?


My underlay was a bit damp so I have taken it out to dry over the next few days/weeks (I cant drive the car due to personal injury at the moment so not too bothered ;/ ), But I did notice it had melted itself to the exhaust tunnel, not sure if carpet underlay will take the temperatures which will be there.


If I am wrong please tell me, as I would like to put some underlay down but not too sure about the above point!


Thanks

Dan


i guess we will find out :lol:


being household stuff it has to be fire retardent to an extent, my car is completely sound deadened under the underlay (foil backed stuff) so im hoping it will be ok?


the 'proper' underlay is a kind of felt so i guess if that doesnt catch fire this wont.......... just to be safe i'll keep a fire extinguiser handy


dont take my word for it though

Share this post


Link to post
Share on other sites
GLPoomobile

The original underlay is 100% fire proof. Simply because it's guaranteed to be 100% soaking wet at all times ;)


I put new underlay in a previous GTI. Didn't look particularly fire retardant - was just a lot of fibre strands tightly packed together - but it never concerned me and never caught fire. To be fair, it was supplied as automotive underlay so it should have been fit for purpose.

Share this post


Link to post
Share on other sites
james_pug

Starting to look like a car again, is it running?

Share this post


Link to post
Share on other sites
pugpete1108

Starting to look like a car again, is it running?


yeah mate its running.


the exhaust is blowing and i need to set the cold idle up but other than that its ok.


i gotta weld up a couple of more trim holes on the front and rear wings then i can get the bodywork finished


paint the bonnet and fit the interior back and im done

Share this post


Link to post
Share on other sites
pugpete1108

right small update.


gearbox is back off to fix what i thought was a leaky input shaft seal, turned out it wasnt but instead either the crank no1 cap seal or the actual crank seal itself.


will be fitting a new crank seal and hoping for the best.


also had a look at the small d/shaft seal to find out it was weld splatter on the shaft causing it not to seal properly(dont ask :ph34r: )so got some emery on that and smoothed it out again, fingers crossed no more leakage.


while it was out i deided to take the manifold off again to tidy up some welds and extend the downpipe to properly fit the centre section.


job done and a lick of vht paint and bobs your uncle:


IMG_0299.jpg


IMG_0297.jpg

Share this post


Link to post
Share on other sites
pugpete1108

bit of a little update before it gets painted.


the car is now mechanically sorted and is driving very well and from these pictuires doesnt look that bad either. but im fussy and in the flesh it looks c*ap so it getting sprayed. not sure what colour yet though. its gotta be a flat colour as im not sure i have the skills to apply metallic.


IMG_0373.jpg


IMG_0401.png


IMG_0372.jpg#

Share this post


Link to post
Share on other sites
pugpete1108

done the last bits of welding to fill the rear wiper/jet and side trim holes on the rear quarters (should have got a base model shell really)


IMG_0398.jpg


IMG_0399.jpg


IMG_0400.jpg

Share this post


Link to post
Share on other sites
pugpete1108

made a start on stripping it down, seeing as its being sprayed anyway i fitted the two virtually brand new wings i had from the matte shell. its a shame to remove original panels (and a pita) but the passenger was dented and the drivers was pretty rippled.


the pu glue turned up today so the wings will be fixed soonish along with the arches again then i can start prepping all the little dents etc for primer.


i was optimistic in the fact that i couls get the drivers one off in tact:


hmmmmm guess not. :lol:


IMG_0477.jpg


passenger was no better:


IMG_0479.jpg

Share this post


Link to post
Share on other sites

Create an account or sign in to comment

You need to be a member in order to leave a comment

Create an account

Sign up for a new account in our community. It's easy!

Register a new account

Sign in

Already have an account? Sign in here.

Sign In Now
Sign in to follow this  

×