Jump to content
  • Welcome to 205GTIDrivers.com!

    Hello dear visitor! Feel free to browse but we invite you to register completely free of charge in order to enjoy the full functionality of the website.

opticaltrigger

[race_prep] Turbo Hill Climb Project

Recommended Posts

opticaltrigger

Hi everyone,

It's time to do some updates again.Slow progress but still moving forward.


Got everything ready and available now to put everything back in the chassis and fire it all up again.

I wont drone on but the pictures should give an idea of where it's all at and weather permiting of course Ritch and I are going to pop it all back in the car tomorow.

Got the trigger wheel machined up and ready for the ally pulley.

Had the rear mount machined up for a more solid approach,and just to do it right,poped a vernier pulley on and dialed in the cam.


All the very best

O.T.


SD531936.jpg


SD531937.jpg


SD531938.jpg


SD531939.jpg


SD531943.jpg


SD531947.jpg


SD531948.jpg


SD531949.jpg

Edited by opticaltrigger

Share this post


Link to post
Share on other sites
opticaltrigger

Once again it's been a long gap between now and the last update I did,but truth is there had not really been any progress for a while.However the last 4 weeks or so has seen quite a bit of movement on the car in particular the Megasquirt is now installed and up and running..."ish".There's still some way to go with mapping it yet but we are definitely on the right track now.


Basically we put the motor back in the car complete with it's newly adjusted vernier cam wheel, it was previously out quite allot on the original OEM wheel as it turned out. It had the VR sensor mounted using the original diagnostics sensor bracket.The 36-1 wheel sat very nicely on the new ally pulley. All of the engine mounts have been made solid, and the top mount intercooler now runs up front, the fuel injectors are now 440cc and the valve lash has been re-done. Most of which is going over the last post a bit I know, but the main progress really has been in the Megasquirt side of things.

So far, that is as of yesterday, we have it so that it starts on the button from cold and idles, however it will only idle when warmed up though at the moment. It's quite happy and responsive and will rev aggressively up to about four grand. ( free reving N/A off load that is. ) .As I said there is still a long way to go with that yet with regards to things like warm up enrichment and acceleration enrichment and also ignition timing ( which is very soft at the moment ), AFR and VE tables.

But as I said, it is all going the right way at the moment and it's great to have some progress again with it. As things stand the motor has about 700 miles running in on it from fresh and all of that was done N/A with the waste gate open.Now over the next few months we intend to start loading it up bit by bit while doing the mapping and get it mapped all the way up to full boost.


At this point I would like to add that this has been a long road with this project and a very great deal of gratitude is owed by us to the many helpful and constructive comments and criticisms given by very learned and experienced folk on this forum. Many of which can be seen to be now adhered to and on the car. eg - the intercooler location and engine management solution.

Thanks very much to all concerned.


Finally,. Madspikes, thankyou again for the copy of your MSQ file. Without that,it would have all taken a great deal more time and agro.It really did show me how to get my head round the VE table and the progression of it .Thankyou.


All the very best

O.T.


IMG_0561.jpg


IMG_0560.jpg


IMG_0559.jpg


IMG_0558.jpg


IMG_0557.jpg


IMG_0556.jpg


IMG_0551.jpg


IMG_0549.jpg


And a short video of us messing around geting it fired up.


http://www.youtube.com/watch?feature=player_detailpage&v=s6bTfd7vo8o

Edited by opticaltrigger

Share this post


Link to post
Share on other sites
opticaltrigger

Hi again all.

Once again it's been anouther big gap between updates on the build.But good things have happened today.We finaly got it MOT'd and all road legal on Thursday and today we took it out for it's first proper drive under some load on the road,Very scary!!!.

Over the last few months various bits and bobs have been finished off and made safe and a fairly basic and safe first map had been done for the Megasquirt.We were very suprised because under some gentle load it seemed to be quite a good start.After some fairly small first steps we gradualy started to increase the load and RPM's all the way up to around 3000 RPM with moderate load and all by the end of today.Very happy with it right now.

All of this was done with the waste gate disconected so as to stay normally asspirated for now.The reason for this is to map it all the way to around 5000 RPM without the possibility of any level of meaningfull boost.So far with a great deal of help from Tunerstudio (Fantastic software) we have it maped quite well up to around 3000 RPM and the next stage will see us map it,again off boost,up to around 5500 RPM.After that comes the really tense part of doing all that again under boost conditions up to the desighn max of aproximatley 15 psi at around (though I dont know for sure yet) 7500 RPM,but easy dose it in small steps is my thinking here.

Just to end on.We did have one drama today though.The Megasquirt Firmware for some reason seemed to completely loose the plot on the A303 outside Yeovil today and it all ground to a hault on the most miserable bit of hard shoulder the council has to offer.The ECU was on Firmware version 3.2.5 when it hapened but very fortunatley I had downloaded the latest release 3.3.1 last night.So there on the side of the road I did a full Firmware revision with the new release and not only were we back on the road but it actualy seemed to be better than before.Scary 20 minutes though.

Any way for those interested I have attached the MSQ we did today if anyone wants to take a look through it feel free,it's still early stuff though.And a few photos from earlier today.


IMG_0712.jpg


IMG_0711.jpg


IMG_0713.jpg


IMG_0714.jpg


IMG_0717.jpg


IMG_0716.jpg


(Ok,cant attach the MSQ file if anyone knows how please)


All the very best guys.

O.T.

  • Like 1

Share this post


Link to post
Share on other sites
opticaltrigger

Things have been progressing along nicley with the car so I thought I'd do another update on it all.

Last week we closed the wastegate on the turbo to try it out on boost and do some mapping.That was great!. ,really it was great to finaly see the car on the road and pumping up some boost,it's five years more or less now since we started.


It is very quick.We could tell really the first moment the throtle was applied with the smallest of loads.Anyway we took it for a gentle ride and watched the AFR gauge all seemed in order,allthough a little rich, so in with a bit of boost.Now it all got a bit more interesting here the first thing we noticed was there didnt seem to be any lag which is great and the dleivery is really strong however it was way to rich so Richie pulled over and we quickly made some alterations to the AFR table and went again.We kept doing this and it kept geting quicker.

When I got home I spent a few hours going through the data logs on Megalogviewer which is much more detailed than trying to do it on the fly and it's plain to see that it can be leaned off in most places still more.Once the fuel all seems to be somwhere near the mark we can then move on to the ignition timing which really is in my mind to be handelled with care on a boosted engine.


As things stand at the moment,it's seen 12 - 15 psi of boost and a maximum rpm of around 4000 so far with no hint of pre-ignition.The plan this weekend is to get it out again and try some 6000 rpm passes and see how it all feels up there.But slowly and carefully in small steps is our moto here.I'll try and do a video from inside under boost because the noise is just the best.


Anyway,all the best

O.T.

  • Like 1

Share this post


Link to post
Share on other sites
jackherer

Sounds promising, looking forward to the video now :)

Share this post


Link to post
Share on other sites
calvinhorse

Nice work O.T, looking forward to seeing some videos :)

Nice work O.T, looking forward to seeing some videos :)

  • Like 1

Share this post


Link to post
Share on other sites
opticaltrigger

Thanks jackherer.I'm looking forward to doing it now.


The noise on the inside is very loud now with the solid mounts on the engine,but no where near as bad as last week as there seemed to be a really strange high speed vibration of the roof pannel very specificaly between around 1900 rpm and 2300 rpm.This was a new development that had popped up as a result of the solid mounts.It was so loud that you couldnt shout to each other and still be heard let alone lissten out for any pre-ignition.But with the aid of two small sheets of what to me is the most fantastic sound deadening material I've ever seen,it all improved drastically to the point where it's no louder in there than what you would expect from any race car interior.Well worth the 650g wheight penalty.


All the best

O.T.

Share this post


Link to post
Share on other sites
opticaltrigger

Thanks very much calvinhorse,

Very much appriceiated but as I said at the the very begining of this project thread...It's by no means all my work,it's my mate Richie's car and we treat it a bit like a joint effort.Nearly everything that is there is all his work.I did build the engine and do the cylinder head work for Rich and I take care of the electronics,and from time to time chuck in some ideas or thoughts on how to solve a problem but every single bracket, clip and bit of pipe work is all down to Richie.


The most impressive bit to me is that it shows just exactly what can be done at home on the drive with limited tools and resources,a little bit of skill and bucket loads of determination and paitience,oh..and of course five years or so.

I personally dont think that one person on there own is going to have a great time,trying to build a car up.There are to many things to think about with project cars and you have to share the load especialy in the dark periods when it's all stacked up against you and it all looks bleak with it all.Alot of them can happen in five years.I wont even go into Decembers storms with a project car on the drive in rural Somerset....Dont, recomend it ....


Anyway, yeah thanks again calvinhorse very kind of you to say so.The plan so far weather permitting is to go out again tomorow and do somore and I'll video it because like I said the sound from the turbo really is a peach because the air intake is just in front of the firewall and there is no silencer on a very short pipe.Nice...


All the best

O.T.

Share this post


Link to post
Share on other sites
opticaltrigger

We've been busy with the car again today and done some more mapping under boost but so far only up to around 4500 Rpm.

Also Rich has been making up some nice bits again.When the storms came in December the outdoor shelter the car sits in got ripped up and over the car and took the door mirrors with it,so undetered we got some new ones and fitted them with some nice ally plates Richie made for behind them.

The manic noise that the roof was making at around 2000 Rpm was almost totally fixed by the two sheets of sound deadening we put up there and Rich is making up some new aluminium trim plates for the rear quater pannels as the original plastic ones took a bit of a dislike to the solvent they got drenched in.There not finished yet but there well underway and look pretty good.


Anyway I've put up some pictures of the car and some of the new bits like the mirrors,sound deadening,and the new trim plates.

And if I've done it right there should be a video of us testing it out under boost earlier today.


All the very best

O.T.


IMG_0742.jpg


IMG_0741.jpg


IMG_0738.jpg


IMG_0733.jpg


IMG_0732.jpg


IMG_0735.jpg


IMG_0744.jpg


https://www.youtube.com/watch?v=tvJOWjf__Bc&feature=youtu.be

Edited by jackherer

Share this post


Link to post
Share on other sites
opticaltrigger

Can anyone tell me how I attach the youtube window and not just a text link ?


Cheers all

O.T.

Edited by opticaltrigger

Share this post


Link to post
Share on other sites
GilesW

Just noticed your roof issue.


Alex Crosse kept his roof lining (now my car) and I was seriously considering bining it.

But from your post and his comments I'm begining to think I shouldn't.


Would you recommend keeping it?

Oh- nice car btw. Enjoyed reading your build.

Share this post


Link to post
Share on other sites
opticaltrigger

Hi Giles,

From a personal point of view I'm really into a clean look inside reace cars and we never really considered keeping it.

But it does have to be said that it's messy geting rid of it.After you take down the lining you get met with the factory sound deadening sheet which is not very good and removing it is a job for a rotary wire wheel really but dont push to hard just let it brush it away and keep moving around so as not to apply to much heat from friction because the bitchumenus material in it bigins to melt and it starts to smear making for even more work removing it.


The only other issue to bear in mind is that there is some increase in noise and vibration.I dont know if your on solid engine mounts like we are but if you are the noise for us at around 2000 Rpm was totaly intollerable and had to be solved.

The cure was the two sheets of sound deadening and two strips of ally bonded to the inside of the roof pannel.However in it's deffence the 650g of two ally strips and the modern super trick sound deadening is way less than the total weight of the factory liner and sound deadening thats there and actualy out performs the original.


So I would say yes,rip it out if you want to Giles.I think it's worth it as you gain a weight benefit and a cleaner look for nothing more than 20 quids worth of materials and a messy weekend.


All the very best

O.T.

Share this post


Link to post
Share on other sites
opticaltrigger

Thanks very much jackherer, your a gem.very helpfull of you and thanks for the link.

Oh and yes I belive they are SPA mirrors from D Tweeks if memory serves.


All the very best and thanks again

O.T.

Share this post


Link to post
Share on other sites
GilesW

Cheers chap.

Sounds a good plan.

Share this post


Link to post
Share on other sites
opticaltrigger

Just anouther small update.And just to show that it's not allways straight forward.We pulled the plugs after the first run into boost in the video and I have to say I'm not overly happy with them really.

They tell me that either we have to much ignition lead or to little fuel or a mixture of both but either way,to my mind it's getting a bit to hot in there and something needs to be done by way of fuel or lead before it gets any more revs and load.


I have a feeling that it's the fuel,i.e. not enough of it rather than the ignition but I'm going to try it again with a bit less lead just to prove a point and then start to richen it up some to see what difference it makes to the colour of the plugs.There's no perceptable preignition to hear of but the plugs tell all.It's definatley hot in there,even taking into account that the plugs are probably

not the correct heat range they still dont look happy to me.


Anyway,all the best

O.T.


IMG_0728-1.jpg


IMG_0726-1.jpg

Share this post


Link to post
Share on other sites
Tom Fenton

Are you not running a Wideband lambda?

Share this post


Link to post
Share on other sites
opticaltrigger

Hi Tom,

Thanks very much for coming back and really good to hear from you again.


Yes,it is on a wide band,we're using the Inovate Lc1 system,and thats the odd thing Tom.To look at the data logs it all does seem to be in the right kind of range as far as goes the AFR.At 12psi ish it's showing around 12:1 and runing down at around 16 degrees of advance.

Now I know very well that theese values are not opotimum by any measure but they are also not outragous either.So I am at the moment a little at a loss as to the exact nature of the the problem.


I would really value your thoughts on it Tom.Especially on the plug colouration and what you think on it.


All the very best and thanks for the reply

O.T.

Share this post


Link to post
Share on other sites
opticaltrigger

Hi Guys,Rich and I have been slugging away at it since the last update I did.

Last time I was posting on here it was because of the above issue regarding the plugs showing a very lean mixture despite the AFR saying all was well.That was a very very scary time because we belived the AFR reading when all along it was lying to us.


It turned out that the fuel pump was failing causing a lean situation under boost and the reason for the false reading can be traced to the Bosch wideband sensor being in error.After some investigations it turns out that theese sensors do go bad over time regardless of useage.The general feeling seems to be that two years is time to be changing it regardless of use if you want maximum accuracy.


To bring things up to date.We changed and uprated the fuel pump,and all of the banjos,fittings and hose.And also moved the fuel input fitting on the rail from one end to the middle so as to try and even things out a little.

The difference in performance was like night and day.The car is really very rapid now by any measure...OR IT WAS !!!


Because as has often been the case with this project more bad luck has struck just as it was all starting to look good.

Affter a few pulls into boost at around 4500 RPM whilst doing some mapping we thought that we had popped the head gasket.And to be honest it seemed quite reasonable to think that.

However as the head came off Rich spotted the problem straight away.One of the Mahle liners had burst (Cylinder No 2) and with less than 1000 miles on it to.

So the hunt for info regarding liners began and rapidly yeilded results.I spoke to Mike Tanski regarding head gaskets over at Ferriday Engineering http://www.ferriday.co.uk/ and he pointed us toward the Comitech steel laminated type.(Mike really is a head gasket Guru and a great guy to.).

I then had a fantastic conversation with a wet liner Guru over at Westwood cylinder liners http://www.westwoodcylinderliners.co.uk/ and they are going to make us a set of new ones from a different type of material which is three times stronger than normal Iron ones and to boot has far better resistance to changing shape with fluctuations in temprature.

Check out the links to the above companies if that sort of thing interests.Theese guys really are on there game.They might be able to help with anyone elses projects.


Anyway here's some pictures of the damaged liner and one of the head where it's easy to see the guilty one.


All the very best guys

O.T.


IMG_0851.jpg


IMG_0852.jpg


IMG_0850.jpg


IMG_0853.jpg


IMG_0854.jpg

Share this post


Link to post
Share on other sites
opticaltrigger

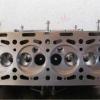
Went in the shed today and started on the cleanup / inspection and general refresh of the cylinder head.

I felt a good time to do it in advance of the new uprated liners.The old ones of which I posted off to Westwood's this morning for use as a pattern.


After a good scrub up round the chambers and valve seats all seems to look quite healthy.It was good to have the chance to closely inspect the surface of the chambers,because they have had some quite serious restructuring done where the squish area used to be,and it was reffreshing to see that it all seems to be holding up well there.

I'm also going to give each of the valves and seats a quick lick with a bit of compound, if nothing else,to give the faces a clean more than anything really.


Anyway,here's a few of the head as I'm cleaning it through.

All the best


O.T.


IMG_0857.jpg


IMG_0856.jpg

Share this post


Link to post
Share on other sites
opticaltrigger

Small update.

Went over to the car today and took a few pics.It's looking a bit sorry for itself at the moment so I thought I'd put a few up of it while it waits for it's new super trick liners from Westwoods.

We cant wait to see them now.I've had several chats with the guys over there regarding liners and now I have to say that if ever I considered doing another one of theese engines I would only consider using the uprated type,even for a normally asspirated one.They really are not that expensive either,considering that they are made to order.


All the very best

O.T.


IMG_0866.jpg


IMG_0869.jpg

Edited by opticaltrigger

Share this post


Link to post
Share on other sites
opticaltrigger

Hi everyone,

There's been a small bit of progress with the car latley so I thought it a good time to post an update.

We recived the new liners from westwoods about a month back but what with work and all we only managed to get to grips with it in the last few days.Rich and I pulled out the engine and had it torn down in a few hours.(It's so much more rewarding tearing down nice clean performance stuff.)


It was a great chance to get a look at bearing shells and stuff like that.(Check out the scuff marks on the big end shells.)

The mains seem to be holding out ok,I seem to have a bit of a habit of paying more attention to the center main though.


There is one area which is scary though.The small end on No1 seems to be tight and will need rectifying before rebuilding,it's just great to have found it now rather than the hard way latter.

Oh yeah,One other issue is that the Piper cam we use seems to be undergoing a bit of a melt down to at the moment.The slot area which is normaly used to drive the standard distributor has fractured and a section come away, which really is odd because it dosent touch anything in this instalation.It to is going to need to be really checked out for any other issues.


Anyhow,some pics of the bits, shells and new ductile Iron liners.

All the best

O.T.


IMG_1295.jpg


IMG_1296.jpg


No1 big end......

IMG_1304.jpg


And it's cap.........

IMG_1305.jpg


The center main......

IMG_1300.jpg


And it's cap.......

IMG_1302.jpg


And the new ductile jobs from Westwoods.......

IMG_1298.jpg


IMG_1297.jpg

Share this post


Link to post
Share on other sites
opticaltrigger

Stuffs been happening again so I thought I'd do an update on the project.


Not sure where to start really but there really has been some problems regarding the engine and parts.

As in the last update,we got the liners delivered and then discovered the issue with the tight small end so thought ok lets get some propper forged pistons.This is the point headaches began

The liners had been made to the standard 83mm size and it turns out that no one manufactures the standard size anymore.Overbore sizes are available though so we were forced to get 83.5mm MI16 Turbo ones which finaly arrived today.

Now the new Ductile liners will have to be bored to suit.


The issue with the cam turned out to be little short of an imminent complete cam failure caught just in time.The poor thing had just started to break up in various places.One of the shoulders on the thrust face had cracked,the drive slot for the dizzy had cracked even though it dosent touch anything,and a couple of lobes and lifters had started to show pitting.Also you could see where a few of the lifters had not been turning much,or at all on two of them.So a new cam was ordered.It's the turbo grind one from Cat cams. http://www.catcams.co.uk/acatalog/XU_Turbocharged.html Never used one before but I hear good reports on it so it should be interesting.


The next headache was thrown up by the poor old turbo which finaly called it time really.It was still working but to be honest we had taken the best of it and it was a bit small so a new TD04L-13T from a Subaru has been got which is much bigger and all in all looks very well suited to the engine.Also this ones water cooled to where as the old one was only oil.But it did well and we learned alot from it.


One other thing.The radiator in the car altough not very old in miles has taken a beating over the years and so Richie got a new ally one and it's stack loads lighter to.

We have to get the various other bits together now like gaskets,bolts,bearings etc,and it's also going to get treated to some new valve springs and some new exhaust valves to.Will get all these bits underway over the next few days and as soon as it's back in the car Richie's going to start work on the new much bigger exhaust manifold.


Loads and loads to do but here's a few pictures of the new bits


All the best

O.T.


The new Cat turbo cam

IMG_1386.jpg


The new forged pistons

IMG_1388.jpg


IMG_1387.jpg


The new TD04L-13T

IMG_1390.jpg


IMG_1389.jpg


And the new super light radiator

IMG_1384.jpg

Edited by opticaltrigger

Share this post


Link to post
Share on other sites
unariciflocos

I also had the same issue with false lambda readings with a Bosch sensor. My 1.8T mates that used to change sensors every 3 months found that installation angle is absolutely critical. It must sit between 1 and 2 o'clock when 9-3 is your horizontal and 12-6 is your vertical. They've had no more issues since.


Good luck with your build.

Share this post


Link to post
Share on other sites
wicked

They are also sensitive for mechanical stress; I've drop them on the ground fi, the ceramic inside can break, causing issues later on when it is heated.


Good luck on the rebuild!

Did you use assembly lube on the previous build, or just oil? (given the wear on the bearings..)

Edited by wicked

Share this post


Link to post
Share on other sites

Create an account or sign in to comment

You need to be a member in order to leave a comment

Create an account

Sign up for a new account in our community. It's easy!

Register a new account

Sign in

Already have an account? Sign in here.

Sign In Now

×