welshpug 1,622 Posted January 17, 2007 (edited) As per title really, thought seeing as no-one has done a detailed guide yet I'd take a load of pictures while I'm doing mine and describe how I went about it. 1. remove passenger side centre console side panel, dont just pull though, there is one torx screw which is shown here just under the white cable tie. 2. remove trim panel from under the blower motor and the sill cover on the passenger side. 3. Remove screw that holds the bonnet pull lever, and loosen the 10mm nut pictured 4. Remove nuts that hold the glovebox lid on, there are 4 (7mm) 5. Drill out the rivets that hold the panel behind the glovebox in, Wedge a large screwdriver like this to stop the rivets from spinning. pull the panel out enough to unplug the Light and switch, then drill out the 2 rivets pictured - Edited January 17, 2007 by WELSHPUG Share this post Link to post Share on other sites
welshpug 1,622 Posted January 17, 2007 6. Drill out the welds that hold the Bracket on the Right hand end of the bottom of the glovebox to the round bar, bottom holes in this picture, the other holes are at the very tp of the pic. once you've drilled these areas out it should lever apart easily with a large screwdriver. 7. Carefully cut the plastic section as pictured. (ignore the bent bracket, took me a while to figure out I needed to drill it) 8. Remove stereo, pretty easy as you have already removed the lower side panel, you can simply push the unit out from behind if you wiggle it from side to side as you push the unit out. 9. Remove gearstick surround and gaiter (they just pull off) this will give you access to the 2 screws that arent in this picture carefully lift the cover below the handbrake lever and undo the 2 screws. Slide both front seats forward and remove the screws from each side of the Console. Pull the console forwards and up over the handbrake lever and gearstick (It will JUST go over) stick the gear lever in 3rd and use it to prop up the console (saves disconnecting all the wiring) 10. Remove the ashtray assembly. this is as far as I've got now, but I have worked out how I'm going to do the rest and get it all back together as strong as before. Share this post Link to post Share on other sites
pug309twin40s 1 Posted January 17, 2007 what have you done to my poor old 405!!! surely you dont have to drill out rivets and drill welds off!!! seems bit drastic to get the heater matrix out. Share this post Link to post Share on other sites
Jer309GTi 3 Posted January 17, 2007 I seem to remember it being a dash-out job, similar to a 306 on the phase 2. Looks drastic but I'm sure its easier than taking the whole dash out. Share this post Link to post Share on other sites
welshpug 1,622 Posted January 17, 2007 (edited) dont worry Paul, You wont even know its been out when its finished (bar the hot air and dry footwell!) IIRC its a lot easier on the Phase 1, But I dont like the look of the P1 dash. I'm doing it this way to avoid having to remove the dash, so far its only taken an hour to get this far, all the bits will either be riveted back or Bolted in place. Edited January 17, 2007 by WELSHPUG Share this post Link to post Share on other sites
cybernck 400 1 Cars Posted January 18, 2007 oh don't mention the 306 phase 2... you need to take everything out to access bolts holding the brake servo too . Share this post Link to post Share on other sites
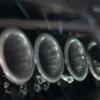
welshpug 1,622 Posted January 18, 2007 UPDATE! did a little more today. After youve removed the ashtray assembly it looks like this - 11. Drill rivet as pictured above. 12. carefully cut the metal bar as below, take care not to cut too far as there is a wiring loom underneath. 13. Pull out the metal bar from the glovebox end, you'll have to give the right hand end of the glovebox aperture a tug to fl;ex the dash enough to slide the bar out, et Voila! one bar out of the way - more tomorrow after I find my Stubby cross headed screwdriver. Share this post Link to post Share on other sites
Borntobewild 1 Posted January 23, 2007 The right way to do this is to remove the whole dash, a big job. I did it the easy way, but I only had to remove the bar on the last photo. But then again, I've got a left-size-drive car. Share this post Link to post Share on other sites
Weasel_77 0 Posted April 26, 2008 Did this job ever get finished? looks very tricky and a lot of butchering in the process. Share this post Link to post Share on other sites
welshpug 1,622 Posted April 27, 2008 yep, finished it a year ago lol, it was simply a case of loosening the bolts securing the bottom of the dash by the centre console enough for the dash to be pulled and the matrix to be slid out. went back together in an hour and a half including filling back up with coolant, toasty warm Share this post Link to post Share on other sites
gingerscotsman 0 Posted April 27, 2008 I did my dads Ph2 many moons ago. It was a bword !!! Did not remember having to drill rivets and cut things though??? Share this post Link to post Share on other sites
Weasel_77 0 Posted April 28, 2008 Did you remove the whole dash or just pull it forward? Ive heard you can change it by just removing the glovebox and pulling the dash forward a bit (or maybe this is the P1) Welshpug: how did you get the bar back together, did you have to do any welding or did it just hold in place with rivets/screws? the fact that you managed to get that poxy panel behind the glovebox out is good, might enable me to get at that clicking ventilator motor too. Share this post Link to post Share on other sites
Herbsman 0 Posted June 20, 2008 the fact that you managed to get that poxy panel behind the glovebox out is good, might enable me to get at that clicking ventilator motor too. <{POST_SNAPBACK}> You can slide/pull the pins out on the glovebox hinges and remove just the glove box to get to that clicking motor. Thats what I did on mine, i then disconected the motor, no more clicking! I also took the bottom of the fan off and wedged the intake flap open to keep fresh air coming in. Hope I don't ever need the matrix changing, great post welshpug. Share this post Link to post Share on other sites
Weasel_77 0 Posted July 19, 2008 Have been away for a while but have now finally started on this job, it looks like it might be possible to get it out without the drilling etc. so far I have managed to pull the dash out enough to give what looks like enough room to get the matrix out. basically just loosened the bolts that hold the dash and removed the steering wheel shroud cover and managed to jimmy the dash out enough on the passenger side and prop it up leaving the matrix obstruction free, will find out during the week when I drain the coolant etc. will post pics later! re the black box: it looks as if I might get it out, apparently you can put new cogs in it to get it working again. Share this post Link to post Share on other sites
Weasel_77 0 Posted July 23, 2008 Having trouble draining the coolant? only drips seem to be coming out, I have opened the plug at the bottom of the radiator, left the cap off and also opened the vent plug at the top of the radiator on the right hand side. I know there are other vents that need to be opened Im just not sure where they are, the Haynes mentions one near the thermostat and another on the coolant by-pass system? is the main on the one on the main pipe from the radiator to the engine? its an XU10J4 engine. Share this post Link to post Share on other sites
Jer309GTi 3 Posted July 23, 2008 Just take the bottom hose off the rad and drain it that way. I expect the drain key on the rad is blocked up with crud Share this post Link to post Share on other sites