Jump to content
  • Welcome to 205GTIDrivers.com!

    Hello dear visitor! Feel free to browse but we invite you to register completely free of charge in order to enjoy the full functionality of the website.

Sign in to follow this  
mattg

[trackday_prep] My '89 1.9 Gti Fast Road/track Day Build

Recommended Posts

mattg

Hi all,


I've wanted to put this up on here for a while but have only just been able to join. I'll do this as a quick update from when I bought the car 6 months ago to now.


Basically I bought the car from a friend who had bought it from another friend with a view to getting it back on the road. The first guy who had it took it off the road, bought alot of the bits and then ran out of enthusiasm.. Friend 2 bought it for a good price but due to having his own 205 and a house to restore never got the chance to touch it. So 6 years of being off the road and I bought it for £250 with all the bits the first guy had bought. It has 81K on the clocks and with a new battery and fuel filter started on the key. The car came with..


New Bilstein dampers

New droplinks

New discs

New pads

New filters

NEw brake hoses


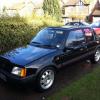
It was a little worse for wear externally but importantly the shell was solid. Under the rear seats is spotless so it's all cosmetic. This is how it looked..


pug1.jpg


IMGP1365.jpg


I won't list all the pics up to now but to summarise....


Stripped


IMGP1410.jpg


Repaired where required, hammerited under the arches/inner wings..


IMGP1458.jpg


IMGP1490.jpg


Suspension built up with new topmounts and all the new bits...


IMGP1709.jpg


This is how she sits now


IMGP1712.jpg


Spend so far is £543.74


This includes..


Springs

Top mounts

Car itself with the bilsteins etc

new solid water hose

two rust free doors - tenner on ebay (wrong colour but will be painted with the new wings etc)

new bonnet in correct colour (ebay 99p)

hammerite

bilthamber rust treatment for front panel

service parts


next update should be good as the paintwork will be done allowing alot of it to be built back up. Then it'll be off with the rear beam for a refurb and to allow me to clean up and paint the rest of the underside.

Share this post


Link to post
Share on other sites
j_turnell

Looking good mate, and only down the road too! :(

Share this post


Link to post
Share on other sites
mattg

So, thought i'd make a start again today. The front suspension etc is all sorted now and the under arches are all protected so wanted to kick off with getting the rear end sorted. It's a while since i've worked on it so I spent most of today getting the garage cleared out. I then turned the car round and started preperations for getting the rear beam off. Mainly getting it sitting on axle stands and giving everything a liberal coating of WD-40. I'll keep doing this throughout the week and then next weekend I should get the exhaust and rear beam off so I can start checking and protecting the floor at the back! How I left it today...


IMGP1750.jpg


IMGP1751.jpg


Not massive progress but i'm back into it now.

Share this post


Link to post
Share on other sites
tezza

looking forward to the progress in this mate. as im going for a similar approach with mine. keep up the brilliant work.

Share this post


Link to post
Share on other sites
mattg

Managed to get a few more hours on it this weekend. Got the rear underside cleaned up, any surface rust ground away before any minor remains getting the Bilthamber treatment and then primed ready for painting.


IMGP1803.jpg


Also got the panels loaded up ready for dropping off at the bodyshop tomorrow when i'm out on my travels. I've got the doors, wings, grill and both valances in there so looking forward to getting them done and bolted back on!


IMGP1804.jpg


Will be speaking to a couple of folks in the week about getting the rear beam sorted. There's definateley some light at the end of the tunnel now.

Share this post


Link to post
Share on other sites
t.staines64

Looks good Im just startin to clean up the underside of mines. I was just wonderin where it up put your axle stands once you took off the rear axle?

Share this post


Link to post
Share on other sites
mattg
Looks good Im just startin to clean up the underside of mines. I was just wonderin where it up put your axle stands once you took off the rear axle?


Just on the sills mate where the jacking points are. It's plenty strong enough and mines getting painted there anyway...


So, few more bits done this today...


Fresh wings on... (will be going back to amber indicators as I found them in a box while sorting a few bits)


IMGP1860.jpg


Spangly new beam on complete with new bearings, mounts etc etc...


IMGP1863.jpg


Calipers painted up and on..


IMGP1866.jpg


And my nice freshly painted valances ready to go on...


IMGP1862.jpg


It's getting there slowly but sureley. Next job is to get the hubs on, new rear dampers fitted and then get the brake flexis swapped to the new ones so it's ready to sit on four wheels again!

Share this post


Link to post
Share on other sites
jord294

nice work matt :D


that beam does look well ;)


look better when the new pipes, brackets, and disc protectors are fitted

Share this post


Link to post
Share on other sites
mattg
nice work matt :D


that beam does look well ;)


look better when the new pipes, brackets, and disc protectors are fitted


It will mate, tope job on the beam refurb mate! can't wait to try the handling with all new suspension

Share this post


Link to post
Share on other sites
mattg

Got some more done today....


Rear dampers arrived...


IMGP1873.jpg


And on...


IMGP1875.jpg


I also got the hubs back on and bolted the calipers up to allow me to get it back on four wheels....


IMGP1874.jpg


Had a sort out and thought i'd roughly mount the bumpers and a few bits of kit to get them out of harms way as I don't want to damage them....


IMGP1882.jpg


IMGP1883.jpg


Almost looks like a car again!


Next job is to sort the brake pipes, respray the sills etc so the new doors can get out of the spare bedroom and onto the car ;-) It's getting there!

Share this post


Link to post
Share on other sites
mattg

Well, things ground to a halt on this a bit but i'm back on it at last! I've started to crack on again , car is now looking like this...


IMAG0077.jpg


IMAG0079.jpg


IMAG0078.jpg


I've decided to get it on the road and enjoy rather than try to finish it 100% before it sees the road. I can concentrate on getting it mint while enjoying it!!


My deadline for roadworthiness is May as I want this to be at PPC in the park. Lot's more progress to follow.

Share this post


Link to post
Share on other sites
mattg

This seems to be taking forever but a decent step forward today. New cambelt, tensioner, waterpump and fuel filter fitted.


Up in the air


7153396a.jpg


Covers and stuff off


ef818bdc.jpg


Pump out


1d451e6d.jpg


New bits all in


ba13db2e.jpg


Fuel filter replaced


ccfb0121.jpg


And the fleet taking up the whole street (oops)


c14a02f1.jpg


So, brakes next Saturday, oil change, gearbox oil change, some fresh coolant, and then it's ready to be fired up. Then it's just final fitting up and MOT time.

Share this post


Link to post
Share on other sites
mattg

Bit of mojo boosting aesthetic work yesterday.


First of all, a local scrappy had one in so went and got some of the bits I had that were missing/damaged..


IMAG0897.jpg


Got busy with the plastic dye on the trim and then had a look at the red strips. Some had been painted purple in the past and others were bent and faded red. A bit of time spend with the pliers straightening them and some Mazda Red I had left over from Jo's old MX5 and things were looking better...


IMAG0899.jpg


Fitted up...


IMAG0903.jpg


Popped the 1.9 and GTI badges to the rear quarters...


IMAG0907.jpg


Drilled the wing, fitted the side repeater and did the final fit with Silkaflex sealing it up...


IMAG0898.jpg


Fitted up the new bumper sliders which I managed to get from Peugeot..


Old..


IMAG0901.jpg


New..


IMAG0900.jpg


And that's about it for the day...


IMAG0906.jpg

Share this post


Link to post
Share on other sites
mattg

Got quite a bit done today...


fitted the rear discs and pads


Adjusted the handbrake


Fitted up all of the coolant hoses with new jubilee clips


Fitted the air filter assembly


fitted the front bumper properly


Fitted the new scrapyard rear panel


Fitted the badges


Fitted the window motors etc into the passenger side door.


fitted my ebay purchase side repeaters £2!


fitted the Exhaust


Fitted the mirrors


Pics from today...


8ebb456a.jpg


a2082c6f.jpg


a93bbea3.jpg


d2e18097.jpg


1a69785f.jpg


56d3312d.jpg


So, whats next


New rear brakes lines


Tyres


Fluid change and... startup

Share this post


Link to post
Share on other sites
mattg

Bit more done today...


Changed the gearbox oil (i'd forgotten how grim it smelt)


Topped up until it starts to drip out of the level plug..


1340e2b9.jpg


Popped the new front number plate on...


b309e000.jpg


Bit of wheel refurb action (nice not to have to worry about the tyre as it needs a full set)


730eb068.jpg


Then thought i'd sort out the messy rear quarter. There was a bit of bubbling when I bought it but it turned out to only be surface rust. Ground it back to good metal, little skim to get it smooth then on with the primer...


0358deb0.jpg


cdf67b87.jpg


On with the paint... Really nice match, you can't tell it's been done (also did edge of the rear quater where primer was showing...


2aeeb293.jpg


On with the wheel with comedy painted tyre..


3e34ff2a.jpg

Share this post


Link to post
Share on other sites
mattg

So, bit of an update of where we are now...


Tyres arrived and fitted up...


IMGP2199.jpg


New aux belt...


IMGP2196.jpg


Oil changed...


IMGP2198.jpg


Radiator changed and fan sensor replaced...


IMGP2250.jpg


IMGP2247.jpg


IMGP2246.jpg


Battery fitted, New brake lines and flexis...


IMGP2251.jpg


And, it's ALIVE!!!


IMGP2252.jpg


http://www.facebook.com/home.php#!/video/video.php?v=1885239453617&comments


A photo of myself, Pete and Dave on Friday eveniing having a celebratory beer after it's first run down the street!


IMGP2253.jpg


Oil pressure is good, fan cuts in and out niceley. Happy days!

Share this post


Link to post
Share on other sites
ash 205gti

looks nice mate :) done a good job :)

Share this post


Link to post
Share on other sites
johnhenry

looks nice mate! currently doing the same with my '89 in the same colour!


lil question, regarding the bolts holding the rear shocks in place, did they come with the dampers or did you buy them seperate? if so where?

Cheers

John

Share this post


Link to post
Share on other sites
mattg

looks nice mate! currently doing the same with my '89 in the same colour!


lil question, regarding the bolts holding the rear shocks in place, did they come with the dampers or did you buy them seperate? if so where?

Cheers

John


sorry for the delayed reply, haven't been on in a while! Have a word with Jord294 on here as I got them with the very nice refurbed beam he did me.


So, have been busy on this over the few week after another small break in progress. Life just seems to get in the way sometimes!


Changed all the hoses for Baker BM's silicone ones.

Sorted a few electrical issues - Just needs an alternator now (on order)

Fitted new compensators to the rear brakes and re-bled the system.

Cleaned up the interior.

Given the whole thing a proper wash and wax.

Few MOT bits like wipers/bulbs


Just need to to a torque check on everything and whack the new alternator on then I should finally get that MOT!

Share this post


Link to post
Share on other sites
mattg

Well, plenty to update pics wise but she passed her first MOT for 8 years today. Can't wait to get some miles on the clock this weekend!

  • Like 1

Share this post


Link to post
Share on other sites
Anthony

Well, plenty to update pics wise but she passed her first MOT for 8 years today. Can't wait to get some miles on the clock this weekend!

Congrats! Now get out there and enjoy the fruits of your hard work! :)

Share this post


Link to post
Share on other sites
mattg

Thanks matey, I certainly am. And on that subject..


Went over to see my mate Pete who has an MI-16 converted one and we went for a bit of a drive... I love this car, so much fun.


pug1-1.jpg


pug2.jpg


Couple of bits I need to do this week, nameley a bit of work on the timing (runs better now i've replaced the knackered vacuum pipe from the throttle body to the distributor, was pinking like anything!) and some alignment as it feels a little twitchy at speed.


Then it's off to Snetterton for the first track day on Friday with Pete and the green one!

Share this post


Link to post
Share on other sites
mattg

Had a cracking day at Snetterton on Friday. Was my first trackday so nerve wracking at first but as the day went on I was getting quicker and quicker. Ended up being held up by an Elise and a couple of 911's on the last session :D I still have lots to learn but have got the bug now. Just need more power!!


Pugontrack.jpg


So, a GTI-6 conversion is now on the cards as I was getting trounced on the straights putting me behind cars which weren't as quick on the twisties which was a shame. Easily remedied though B)

Share this post


Link to post
Share on other sites
toonz

Hey Mattg, top job mate - that is a very tidy restoration mate, mines being readied for its first MOT in 3years. Unfortunately she will eventually go to a new home in new year, but not before I've had a few drives in it!

By the way if you fancied keeping it 8v and want more power I've got a very tasty hill climb engine in the shed i bought from Danpug 3 years ago... if you're interested PM me! (175-185bhp on carbs :)

Share this post


Link to post
Share on other sites

Create an account or sign in to comment

You need to be a member in order to leave a comment

Create an account

Sign up for a new account in our community. It's easy!

Register a new account

Sign in

Already have an account? Sign in here.

Sign In Now
Sign in to follow this  

×