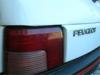
humanz 3 Posted July 1, 2008 Currently trying to re-wire my dash, but I'm having problems trying to find what plug goes where. Where does the plug coming for the centre console go? In the fuse box, or to some other connector on the internal loom? (see picture below) I'm not experienced when it comes to wiring, or wiring diagrams or what have you. So I was wondering: do all those codes I see in my Haynes manual wiring diagrams actually correspond to wires? Also, I noticed two brown plugs coming from the engine bay to the interior of the car, but I have no idea what plugs into them. I'll check for does on the wires later today and update this thread. Below is a pick of the two plugs. Share this post Link to post Share on other sites
Tommer 0 Posted July 1, 2008 not 100% sure, even though I only took mine out the other day, they should only plug into one place... as in you can't plug them in where they aren't meant to go. there are some plugs that are hidden below the lower trim where the bonnet release lever is, it might be one of those. just look for anything that isn't connected, you can't go far wrong... trying to rack my brain on the 2 large ones, either they go into the fusebox, or they go up under the dash itself... Share this post Link to post Share on other sites
welshpug 1,683 Posted July 1, 2008 yes the numbers on the wires should correspond to the ones on the diagrams in the Haynes manual. the 2 large plugs connect the engine loom to the ECU and dash wiring, there would be 2 plugs near the lower steering column that match. Share this post Link to post Share on other sites
humanz 3 Posted July 2, 2008 yes the numbers on the wires should correspond to the ones on the diagrams in the Haynes manual. the 2 large plugs connect the engine loom to the ECU and dash wiring, there would be 2 plugs near the lower steering column that match. Hmmm....ok, I was trying the only fits one place rule, but then the larger plug seemed to plug into wires coming from the engine bay. I'll check the ECU loom and see what's what. I did check the wires in the connectors for codes, but I couldn't read all the codes. Nevertheless, the brown plug on top reads Pin2 - 112 ? Pin3 - 47B Pin4 - 74A Pin5 - 7A Pin7 - 47 Pin8 - 69A A-MP - two thick cables, no codes ? The smaller brown plug Pin1 - ? Pin3 - 30A Pin5 - 47A Pin6 - ? A-MP - 30B I also have a whole host of other plugs I cant figure out, but if I can start matching the codes to my Haynes manual, I think I might be able to sort myself out. But as for right now, I'm still lost. PS Are those the codes I need to match back in my Haynes manual, or do I need to search further along the wire to find a second code? Share this post Link to post Share on other sites
Ethos 0 Posted July 2, 2008 This might help? http://forum.205gtidrivers.com/index.php?a...ost&id=3392 Share this post Link to post Share on other sites
Ethos 0 Posted July 2, 2008 Nevertheless, the brown plug on top readsPin2 - 112 Tachometer Pin3 - 47B Pin4 - 74A Pin5 - 7A Alternator Pin7 - 47 Coolant warning light Pin8 - 69A A-MP - two thick cables, no codes ? The smaller brown plug Pin1 - ? Pin3 - 30A Oil temp sensor Pin5 - 47A Coolant meter Pin6 - ? A-MP - 30B Oil pressure gauge I've put the ones I know to help you out a bit. Share this post Link to post Share on other sites
pug_ham 245 3 Cars Posted July 3, 2008 They aren't the usual brown multipugs under the dash imo, too many wires & the numbers / colours aren't all right. Nevertheless, the brown plug on top readsPin2 - 112 rev counter / coil wire. Pin3 - 47B low coolant sender unit Pin4 - 74A Diagnostic socket (K light) Pin5 - 7A Alternator Pin7 - 47 Coolant temp switch Pin8 - 69A Can't find 69A but 69 goes to low brake fluid sensor & 69B/C go to pad wear indicators. A-MP - two thick cables, no codes ? The smaller brown plug Pin1 - ? Pin3 - 30A 30R? Oil presure stop switch Pin5 - 47A Coolant temp guage sender unit Pin6 - ? A-MP - 30B Oil presure sender unit Done what I can figure out from the wire numbers given & my Haynes. PS Are those the codes I need to match back in my Haynes manual, or do I need to search further along the wire to find a second code? Generally the numbers near the end of the wire close to the plug is the wire number you need to find but they differ between each section occasionally; eg: 47 goes to 47A/B as it runs through its whole path. Graham. Share this post Link to post Share on other sites
humanz 3 Posted July 3, 2008 They aren't the usual brown multipugs under the dash imo, too many wires & the numbers / colours aren't all right.Graham. So basically, this is an engine loom that's been messed with then? To me, the only plugs that fit back into those two plugs come from the same engine loom. Sigh. I guess my best bet would be to pull that engine loom out and use the one from the 1.9 that I'm scrapping then. The wiring in the 1.9 doesnt look messed about with at all. Only thing is, I don't think the other loom has plugs for side repeaters, as these seem to have been removed. Thanks for the help all. Ethos, did you make that drawing up yourself? Share this post Link to post Share on other sites
Grim.Badger 15 Posted July 3, 2008 Ethos, did you make that drawing up yourself? No I did Looks like your brown multiplugs have been re-arranged or put together strangely by Peugeot. As Graham said the wire numbers can be found in the haynes manual next to each wire; numbers in circles are the devices such as alternator and starter motor the numbers of which are explained at the start of the wiring diagram chapter. Share this post Link to post Share on other sites
humanz 3 Posted July 3, 2008 (edited) No I did Looks like your brown multiplugs have been re-arranged or put together strangely by Peugeot. As Graham said the wire numbers can be found in the haynes manual next to each wire; numbers in circles are the devices such as alternator and starter motor the numbers of which are explained at the start of the wiring diagram chapter. Nice pic. Since the wiring didnt originally come with the car, but from a car known only to a friend of mine, I have no idea what's the deal with the wiring. All the original wiring from the car (phase1) was shot, so I've been trying to replace the looms. As it is right now, my Phase 2 dash loom seems more complete than my Phase1 loom, so i'm considering adapting the loom (?) to work with my Phase 1 dashboard. Thanks for the help with the Haynes manual wiring diagrams. Think i've mostly got it. Only thing, I notice the drawings of the fuse/relay board have capital letters where plugs go into the fuse board. What do these letters represent? Do they tell you exactly where on the board the plug fits? Edit: the thing about those plugs is, from reading the posts on brown multiplugs, they seem to be found in the engine bay. Those two plugs in the picture above are actually inside the car, by the fuse board. Edited July 3, 2008 by humanz Share this post Link to post Share on other sites
steve@cornwall 100 Posted July 3, 2008 Nice pic. Since the wiring didnt originally come with the car, but from a car known only to a friend of mine, I have no idea what's the deal with the wiring. All the original wiring from the car (phase1) was shot, so I've been trying to replace the looms. As it is right now, my Phase 2 dash loom seems more complete than my Phase1 loom, so i'm considering adapting the loom (?) to work with my Phase 1 dashboard. Thanks for the help with the Haynes manual wiring diagrams. Think i've mostly got it. Only thing, I notice the drawings of the fuse/relay board have capital letters where plugs go into the fuse board. What do these letters represent? Do they tell you exactly where on the board the plug fits? Edit: the thing about those plugs is, from reading the posts on brown multiplugs, they seem to be found in the engine bay. Those two plugs in the picture above are actually inside the car, by the fuse board. The 2 brown plugs are not found on the Ph1 - which has a dedicated engine management loom (which strangely does not include fuelling- tachymetric relay) The Ph2 engine loom includes some dash wiring and fuelling a lot of which enters the Ph 1 cabin with the loom under the expansion bottle with the exception of the tachy. relay which is mounted in a box on the chassis leg, the wiring from this may even be incorporated in the lighting loom on the Ph1 (?) Personally I would attempt to rebuild my Ph1 dash loom wire by wire before trying to mate these 2 looms! Share this post Link to post Share on other sites
humanz 3 Posted July 3, 2008 Personally I would attempt to rebuild my Ph1 dash loom wire by wire before trying to mate these 2 looms! What if I take my ph 2 loom and modify it to fit my ph1 dashboard? The Haynes manual doesnt specify any difference in wiring codes between the phases, so the wires for the digital clock, cigar lighter, heater controls and centre switches should all be there, even if the connectors are different. Then i would just have to "rebuild" the correct connectors to fit the ph1 dash. What do you think? Feasible? Share this post Link to post Share on other sites
pug_ham 245 3 Cars Posted July 3, 2008 So basically, this is an engine loom that's been messed with then? Not necessarily, they could be from further under the dash nearer to the fusebox but I've just unearthed the engine loom from my 1992 1.6 Gti & they match quite well with the two underdash brown multi plugs on this loom. These could still join further under the dash & lead to the plugs in the drivers footwell though. As shown in this picture of them. Only thing, I notice the drawings of the fuse/relay board have capital letters where plugs go into the fuse board. What do these letters represent? Do they tell you exactly where on the board the plug fits? Yes they show the plug location on the fuseboard but they can't be mixed up as they are all keyed to fit differently. This picture shows them. Graham. Share this post Link to post Share on other sites
humanz 3 Posted July 3, 2008 Not necessarily, they could be from further under the dash nearer to the fusebox but I've just unearthed the engine loom from my 1992 1.6 Gti & they match quite well with the two underdash brown multi plugs on this loom. These could still join further under the dash & lead to the plugs in the drivers footwell though. Yes they show the plug location on the fuseboard but they can't be mixed up as they are all keyed to fit differently. Graham. You, sir, are a very good man. That last pic shall be very useful if i need to piece together a ph2+1 loom. As to the brown plugs joining and leading to the drivers footwell, that would only be for ph2 looms? or ph1 looms as well? Share this post Link to post Share on other sites
humanz 3 Posted July 7, 2008 Ok, so I think I've figured out this brown multiplug thing. In the ph1 GTIs, wires ran directly from the engine bay to the clocks through a white connector and a small blue 4 or 5 pin connector. Also possibly a small brown plug. I've rebuilt a ph 1 loom (courtesy of Smokey on here) as far as I can tell. Now, if I do go ahead and use the ph2 engine bay loom, should I rebuild the ph1 loom to work with the brown multiplugs (I have spare connectors for the clocks from two partial ph2 looms), or should I just try locating a ph1 engine loom? Also, does anyone have pinout diagrams of the white connector and the small blue connector that go into the back of the GTI clocks? And the orange connector from the roof console: the wiring was from an XS and I found a matching plug on the original XS wiring, so I've managed to connect up the roof wiring to the fuse board. Thanks for all the help. Share this post Link to post Share on other sites
steve@cornwall 100 Posted July 7, 2008 What if I take my ph 2 loom and modify it to fit my ph1 dashboard? The Haynes manual doesnt specify any difference in wiring codes between the phases, so the wires for the digital clock, cigar lighter, heater controls and centre switches should all be there, even if the connectors are different. Then i would just have to "rebuild" the correct connectors to fit the ph1 dash. What do you think? Feasible? I modified a Ph1 loom to run switches etc. on a Ph2 dash - it seemed straightforward at first glance but turned into a real headache that took days to sort. So I would think certainly possible, but I wouldn't do anything like it again. You will need plenty of patience, which from your posts, you have tons more than me!!! I reckon it would make a brilliant article if you document each stage. Share this post Link to post Share on other sites
pug_ham 245 3 Cars Posted July 7, 2008 The small blue connector that goes to the back of the clocks you mention (four pin plug) is for the rev counter but will only have three wires going to it (12v, earth & tacho signal from coil). The phase 1 cars run wire to the guages etc directly from the fuse box afaik without any brown multiplugs under the dash in the drivers footwell. I found a (french iirc) wesite that showed the full breakdown of where the wires to the back of the clocks go but can't find it now. I did copy the lists though but I'm not sure of the accuracy as I've got two lists; The white connector: (noted as 309SR) N° of Colour pin of the wire Number Function; 1 NC oil temperature (also connected on No. 3) 2 Red 30B Oil pressure 3 NC oil temperature 4 Blue m3 clock, headlights and fuel gauge. 5 M1J masse. 6 Yellow 47 Water temp guage 7 30J oil temperature 8 NC Water in the fuel (diesel) 9 NC detection of open doors 10 m3 masse. 1 Green 73 Hand Brake light. 2 Blue 51 Indicator 3 Mass M25 Masse lighting dashboard 4 Masse m3 Masses clock, witness of headlights and fuel gauge. 5 Pink J1 full beam 6 Beige R1 dipped headlight 7 Green (55A?) sidelights 8 NC Towards rev counter? 9 Red 13A + permanent (for clock) 10 White 33 +Acc Graham. Share this post Link to post Share on other sites