Jump to content
  • Welcome to 205GTIDrivers.com!

    Hello dear visitor! Feel free to browse but we invite you to register completely free of charge in order to enjoy the full functionality of the website.

SweetBadger

Gti6 race engine upgrade - Staged injectors and exhaust

Recommended Posts

SweetBadger

Inspired by @DrSarty and @petert's updates I thought I'd post a little update on my latest 205 shenanigans.


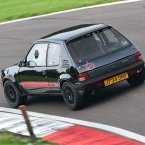
My 205 is a road legal race car - I'm one of the few who are brave (or stupid) enough to still drive a race prepped 205 on the road!


It was off the road for almost the whole of last year while I had other life things going on, but I managed to take the opportunity to keep the hobby going and make some engine 'upgrades' while it was off the road.


When it was mapped at Longman Racing after an engine rebuild about 3 years ago done by Brett Sims I was very happy with the results - consistently made 206hp on their hub dyno with one power run seeing 212 at the hubs. Spec of the engine back then was:


- 2l Gti6 with forged pistons, robson rods, std crank, solid lifters, rally/race catcams, and std Gti6 head

- Satchel inlet with the 45mm lotus throttle bodies

- Standard re-angled Gti6 exhaust, Pug racing 2.25 inch stainless exhaust

- DTA S40


The general consensus when it was mapped was that the std exhaust manifold was probably the limiting factor.


I also tried it with / without an airbox (I use the airbox when noise is a problem at track days), and although the airbox didn't make as much mid range power it didn't make a massive difference and actually needed more fuel at the top of the rev range.


Anyway - the upgrades - I decided that I'd see what I could get out of it with the addition of a maniflow race exhaust manifold and 2.5 inch system, and then thought I'd also give staged injection a go.


Exhaust - The manifold required the subframe to be remove to fit, but fitted perfectly and didn't foul on the bulkhead, so that was the easy part.


Staged Injection


Not so easy! The only way to do this with the satchel manifold and lotus bodies was so fit an external fuel rail and shower injectors. So I did a few drawings and scratched my head for a while and then came up with a plan.


- 6mm aluminium back plate bolted between the bodies and the manifold

- cheap fuel rail extrusion from China

- 3 custom aluminium mounting towers

- an external fuel rail holding 4 ev14 injectors spraying fuel directly into the trumpets

- 22mm cylindrical injector retainers to hold the injectors into the rail - @allanallenat Bridgecraft did a fantastic job of machining these and welding the fittings to the fuel rail.

- injectors passing through grommets in the airbox

- New injector loom


So one order of aluminium, some drill bits, a power file, a dremel with some burr bits,  and lots and lots of aluminium dust later here’s how it came together:


857601909_Picture1(Medium)(Small).png.2136d33358e29a4f3e30ee754bdf3c02.png134104608_Picture2(Medium)(Small).png.3658905631b175d49d6d900a9218874b.png


Finished rail and injector holders back from Bridgecraft:


Note the u-section brackets were my handy work, hence the less than perfect finish!


image.png.4941ba2b8d4e502c053828e94c4e8600.png


Attached to the car:


1209441926_Picture3(Medium)(Small).png.52a7d7906d1d39f0fe939a5d6fb4ab7c.png1521236021_Picture6(Medium)(Small).png.1abf8c16cb5af755e9c62aa082db8f31.png


With airbox:


633804012_Picture7(Medium)(Small).png.a320ace53e29d85a971709edd0b92c85.png1492271961_Picture8(Medium)(Small).png.e419ca33bf7d1dfe533a36fff6b4143d.png


Batch vs semi-sequential injection


There is an unfortunate side effect of moving to staged injection with a DTA S40 – it only has 2 injector drivers, so you have to go from semi-sequential injection to batch fired (alla early Jetronic / motronic management).


Conventional internet wisdom says that this should not impact peak power, but idle quality, drivability and fuel consumption might suffer. This is a race car, I thought, not a problem.


Mike at Longman was not convinced – in fact he was amazed it arrived running so well, and did not give me much confidence that we’d see a good result on batch injection.


On the dyno


Airbox…


Using the airbox gave very disappointing results.


-          Less power everywhere

-          Big loss in mid-range torque

-          No gain from the shower injectors

-          Worse still, better power on the inner injectors only, but only with semi-sequential injection (injectors firing in pairs). Batch injection simply didn’t do as good a job – Mike was quite right to be sceptical.


And, for some reason the new exhaust did not seem to play nicely with the new intake setup.


No Airbox


Then we tried with the airbox removed – inner injection only - huge improvement over the airbox.


The engine woke up and came alive and produced a much smoother torque curve lower in the rev range than with the std exhaust manifold. But… No real improvement in ultimate power over the standard Gti6 exhaust manifold!


Staged Injection and No Airbox


Thank feck – we saw gains from the shower injectors! Not much, but small gains from 4.5k to the limiter, and a peak power of 209hp up from 206hp consistently.


It produced best power at 50% inners and 50% outers and >50% throttle opening. From memory initially coming in at 25% from around 4000rpm.


So a few % - worth the effort? No! But it does look bloody cool!


And I think that with a decent ECU and sequential injection there’s more to be had.


The surprising thing was that the exhaust manifold really didn’t seem to add much power, It did fill in the torque lower in the rev range for sure, but no peak gains. I think this shows that the Gti6 exhaust is very good as standard, but also that the satchel long inlet and lotus bodies might be better suited to lower revving engines.


A big thanks to Mike at Longman for persevering and getting the best possible out of the setup. 


Final setup – air filter butchering.


I needed a way of attaching a filter with the external rail and injectors – so out came the soldering iron.


And the final setup – looks surprisingly neat actually!

1892150615_Picture9(Medium)(Small).thumb.png.315746d7d381b04bc1081dcc83a69da4.png1096889635_Picture10(Medium)(Small).png.72b1a406b07fc701ce91834e908cabe7.png


Power run:

image.thumb.jpeg.df12d69deb29609596274b76ca0571d3.jpeg


What’s next?


Some more track days before winter and then a new ECU with fully sequential injection.


I think I’m going to see what I can do with a rusEFI ECU – heard some very good things about them and they have a lot of features for very little money.

Picture11.jpg

  • Like 2

Share this post


Link to post
Share on other sites
petert

Great data. However, I'm not sure how to compare the hub dyno hp numbers. How does that compare to hp at the wheels? Or an estimated flywheel figure?


What does stand out is the lack of RPM. Three questions:
How much CR?

What cams?

Is it dry sumped?


I think you've nailed the inlet and volumetric efficiency.


As for sequential vrs batch, when the injectors are at their max, there is no difference. The benefit comes from torque, existing corners.

Share this post


Link to post
Share on other sites
SweetBadger


A conservative estimate would be 235hp at the flywheel, not sure on wheels, but I'm guessing it'd be less due to losses through the tyres.


Cams are Catcams 4902375:


- 298°/290° @ 0.1mm
- 260°/252° @ 1.0mm
- max lift in/ex 12.5mm/12.0mm
- Lift @tdc in/ex 4.30mm/3.75mm
 

RPM shown is derived using rpm by gear ratio - the scale might be slightly off as it was taken to the rev limit (8250) on the power runs - looks like it's showing 200rpm lower.


Not sure on the static CR, but to give an idea I see 225-230 psi on a compression test with a tired standard starter motor.


Not dry sumped, (still using an accusump) but that needs to be added to the shopping list! 


It was certainly happier with semi-sequential over batch injection when the air-box was in play - more mid range and outright power. And this was repeatable. But it ultimately made the most power with staged batch injection (50:50 inners:outers) with open trumpets.


I think that a shorter inlet might unlock more power higher up in the rev range, but it drives really well as it is so I'm going to leave that alone for now. I fancy a new project using a modern ECU.


I'd also like to go to DBW. It would allow me to limit power by RPM making the car eligible for more race series, in fact if power was dynamically limited by max throttle vs rpm I'd be able to effectively make the maximum class power for a class B car in the series I've been racing in from about 5800rpm upward, without having to use the 80kg of ballast that I used to run! 


Share this post


Link to post
Share on other sites
petert

Indeed, a modern ECU like an Emtron KV8 or Haltech R3 or R5 would allow you to run staged sequential injection and torque control via DBW. Dry sumping is an instant 15-20hp. Those cams are big enough that you should be seeing a peak hp at approx. 8250 and an 8500 limit. Do you know what centrelines they are set up at? 


I'd be dry sumping before changing the ecu.

Edited by petert

Share this post


Link to post
Share on other sites
SweetBadger

Interesting point on the dry sump - it needs doing - the accusump is keeping the engine alive, but I'm still seeing pressure drops after heavy braking into righthanders.


15-20hp gain is loads! - assuming some of that is from a reduction in windage due to crank case vacuum, but surely not all of it? Is there an increase in engine VE due to better ring sealing too? In which case would a remap be required after fitting the sump to get the gains? 


If so then I'd be looking at a new ECU to go with the dry sump, as another remap with the S40 is probably false economy in the long run.


Sorry took me a while to find the exact cam specs.

This is the 3rd iteration / rebuild of the engine (1. initial as bought, 2. then a like for like rebuild, both with way too much compression, then 3. the current build which has been done properly!). Head cams have always been the same, and each build has made peak power at a similar RPM. 


I don't know the exact cam timing, but I'm assuming it's been timed up as per the catcams specs:


image.thumb.png.e443066f7c98f662b0b62fdb8e85e8b8.png


Share this post


Link to post
Share on other sites
petert

You really should verify the cam timing before anymore tuning. I've found that 105º inlet & 109º exhaust was better for mine. It ironed out the bumps and gave a flatter/wider torque curve. The dry sump is a straight gain as the crank spins freely, without oil clinging to it. You can experiment with an orifice/restrictor in the breather, but I just leave it wide open.  Too much restriction and you'll suck the cam seals in.

Edited by petert

Share this post


Link to post
Share on other sites
SweetBadger

Yes I'll verify the cam timing when I get a mo. I'll also need to get the piston-valve clearance from the builder before I try advancing the inlet cam though. 


So with 105º inlet & 109º if I've got this right you found best results with a slightly more advanced inlet and retarded exhaust - giving less overlap? That might suit my engine given it doesn't want to make peak power at the high RPM that the cam specs suggest it should.


Dry sumps are pricey these days! The pug1off kit uses an AT Power sump / pump and looks like a neat setup, but will be 3k+, and it looks like pace still do the sump / pump setup, but I'd need to add oil tank, hoses, larger flow oil cooler on top of that too.


Might keep my eyes peeled for a 2nd hand sump/pump but they don't come up very often!

Share this post


Link to post
Share on other sites
petert

Hopefully there's enough room for you to move 1º! Otherwise, he built it way too tight. I don't have access to my inlet at the moment to measure the length. That would be interesting to compare. The only way to really dial it in is on the dyno. My torque curve is very flat compared to yours. 


I would contact Wayne Mathurin at Neil Brown Engineering in regards to dry sumps. Indeed, the cost of all the hoses and fittings do stack up! You'll probably find you need less oil cooler, as the tank dissipates heat.


The graph attached is 500 RPM out.


Screenshot 2026-09-29 at 7.59.35 am.png

Share this post


Link to post
Share on other sites
SweetBadger

Yeah hopefully! I'm sure it won't have been built too tight. When I get a mo I'll get accurate measurements on the total length of the inlet runners and post back, but I think it's about 340mm from memory. 


Your torque curve is incredibly smooth and flat - looks like a really well thought out build. It must be fantastic to drive.


Thanks for the details, will get in touch with Wayne at Neil Brown Engineering and see what he can put together for me. re the oil cooler, the one I have is fine from a cooling capacity perspective (oil at 110 degrees ish after a long time on track), but from what I've read because the fittings are 1/2 BSP it will be too restrictive to flow, so I'd need a like for like size but with bigger fittings.

Share this post


Link to post
Share on other sites
petert

Yes, my oil cooler is AN12, in the return line.

  • Thanks 1

Share this post


Link to post
Share on other sites
SweetBadger


Bit of an update - another improvement was very much needed after the track day at Cadwell. 


The car did it's best to turn itself into a fireball by ejecting one of the inner injectors from the fuel rail! The manifold does not provide any positive stop on the nose of the injector, and the injector can push through the injector bung into the manifold far enough that the upper o-ring is completely out of the fuel rail. The only thing holding the injectors into the fuel rail are the standard Gti6 steel spring clips.


One clip decided it had had enough on track and came unclipped = 4 bar of fuel spraying all over the hot engine bay :o, very lucky it didn't ignite! Thankfully I was close to the exit to the paddock when I smelt the fuel!


So I came up with some retainers using some 3mm aluminium angle, and removed some material from the injector bungs to produce a flat stop - injectors won't be popping out again now!


2133971819_WhatsAppImage2026-10-02at13_57_22.thumb.jpeg.2f0a182225a5000f1bc2c4d7631d18a1.jpeg


179722921_WhatsAppImage2026-09-30at14_52.47(1).thumb.jpeg.a9fec38f9316ef29a62276017b2825af.jpeg937607302_WhatsAppImage2026-09-30at14_52.47(2).thumb.jpeg.b636a715f8e619c2541080eac14d41ca.jpeg


1691103171_WhatsAppImage2026-09-30at14_52_48.thumb.jpeg.432b11483e0b3683b37cd84a8594b963.jpeg1314734144_WhatsAppImage2026-09-30at14_52.48(1).thumb.jpeg.a82a64b0ea01c092be020ab2256a3ef6.jpeg


Not sure why the clip came off, but before the remap I upped the pressure to 4-bar - in the previous mapping session the inner injectors were at their limit, so I upped the pressure to 4-bar to give some headroom. Additional pressure could have contributed.


Share this post


Link to post
Share on other sites
petert

Mine were the same. I turned up some 3mm aluminium rings, which sit under the injector, doing the same thing as your plate.

Share this post


Link to post
Share on other sites
SweetBadger

I thought about doing something similar with some nylon snap rings or aluminium spacers, would have probably been neater, but I was wasn't sure how to reliably retain the spacers - did you slot them and use something to stop them moving? 


In other news I picked up a DTA S60 for a very good price - the S40 map loads directly, but it uses two ECU plugs (power and sensor). Took me about an hour to re-pin the existing plug and add a new sensor plug to the loom, and the engine is up and running with it. Have also ordered a wideband lambda sensor and controller. 


Should be able to sell the S40 and almost break even, so happy with that. 


Will get it down to have the map tweaked for semi-sequential injection and also play with cam timing at the same time - time permitting. Will be able to provide a tested direct comparison of batch vs semi-sequential on the staged injectors, so should be interesting.


Pricing up the dry sump after contacting Wayne at Neil Brown Engineering. Using a Pace kit and then sourcing the tank, pipework myself I think I can do it for about £2.5k. If I relocate the header tank, then the dry sump tank can sit where the std header tank is which will keep it all confined to the engine bay and keep pipe runs to a minimum. Time to start saving! 

Share this post


Link to post
Share on other sites
petert

The rings can turn, but the compressive force from the injector rail keeps them in place.


Why wouldn't you run full sequential with the S60? It has four injector and four ignition outputs.

Share this post


Link to post
Share on other sites
SweetBadger


I'd need 8 injector drivers for full sequential to cater for the outer set of injectors so I'm limited to semi-sequential with the S60.


If I ditched the 2nd set of injectors I could run full sequential, but I'd also need a cam sensor which I currently don't have, and my vernier pulleys don't have the pickup for the std Gti6 sensor.

Share this post


Link to post
Share on other sites
petert

You could run standard vernier pulleys to solve part of that problem. The cam sensor is easily obtainable.

Share this post


Link to post
Share on other sites

Please sign in to comment

You will be able to leave a comment after signing in


Sign In Now

×