Jump to content
  • Welcome to 205GTIDrivers.com!

    Hello dear visitor! Feel free to browse but we invite you to register completely free of charge in order to enjoy the full functionality of the website.

Sign in to follow this  
acox99

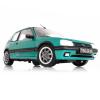
Lazer Green 1.6 Rolling Resto & Recommision

Recommended Posts

acox99

I thought that it was apt to start my own thread showing the work in progress and what I have done so far. I have been on this forum many years now, and largely played a background roll. I have had this car for coming up 5 years, its been on the road for 8 months during that time and undercover storage until last may when I brought it out to "just get it running" and back on the road, its escalated but that's my fault, I cant leave things alone!


A bit of background, I bought the car on ebay with a broken belt, it was a smart looking up together car with bags of history, it was local and I love the colour and had a hankering for 205's again, I did what was needed used it in the summer, put a clutch in it. Winter arrived and that was it. Come may 2013 and I lost the garage it was in, the in laws decided to inconveniently move and the plan was to get it on the road.


I'm lucky that I am a mechanic already so have all the facilities and workshop to hand.


96511A6A-ED99-4D13-983E-5D135D16DBDB_zps


I knew it was a bit scabby underneath and it needed a tune up and the idle sorting, the SAD plug was on the reverse switch on the gearbox, not my doing. Running sweetly I looked over it, pulled the bumpers off to sort out the scabs, got the screw driver out and poked holes in the inner wings under the seats and behind the rear wheel arches.


I intended to try and do local repairs, and I was pretty happy with the outcome, I cut out the rot and made up repair sections, removed and treated any rust on the inner wings, and front panel and stone chipped to give extra protection


8F0F6001-F9F6-4DCE-A9C7-03DC2678BA00_zps


854D4EE4-F625-4DF5-9888-F20EFFC50DEF_zps


P1010987_zps1d4f1bb0.jpg


0AC9FC89-9E5B-45E8-8967-513035E36D3E_zps


4AC0057A-133F-41B7-8812-6883BD5A4050_zps


6AF073C8-DAF6-4215-BB13-FFB4A0DCF0BF_zps


F33A501B-354A-460E-9FB8-1DEF0C85F8F8_zps


I was pretty happy with how it was coming along, but the inner wings where letting the engine bay and underside down, and I had to remove the front suspension to make a descent job of painting the wheel arches


9D8C4575-A7F7-4EEE-9B22-6145B22C01B5_zps


spot blasted inside of bonnet, primed and painted


93908B82-AFE8-4C76-B82F-14E87A47FA1B_zps


Rot holes found in the section behind rear wheel arch, the bumper mounts where still perfect, so I made up repair sections


P1010991_zps1c9722d7.jpg


P1010999_zps470301da.jpg


P1010998_zpsec56c35d.jpg


559D9410-9C70-47BE-A289-F12BBE261C7A_zps


Moved back to the front again, pulled the front suspension out, removed and replaced all bushes, blasted, primed and painted every part and re assembled.


http://i94.photobucket.com/albums/l88/triple_a_motorsport/Jean%

20Claude/3A33917D-2A30-40A3-8EC0-A83D0DBCFF0A_zpsh6bhn82w.jpg


E932EA0F-817A-4DF6-AD19-2F20EB35DF8A_zps


0DCFD313-EB16-4028-88CB-E7DA0AA61FD7_zps


664EE25A-3BFD-483A-9763-C73062D07E64_zps


as you can see at this stage I originally intended to leave the engine in situ and do it another time, but it was harder working round it......So it came out, I will now detail the complete engine and box before I re install it.


81EC588B-85D6-4A85-9EF9-76A1DE429D59_zps


I cleared out the engine bay, it wasn't rusty, just dirty and lacking paint, I flatted back what was there, primed any areas that needed it, stonechipped chassis legs and bulkhead a bit and the underside and painted with base coat mixed with lacquer an harder to make it hard and durable.


20FA370D-E2B0-4FA2-8C37-3D0DF2CC078D_zps


83FCF183-93FB-4B03-981B-0691A65D3742_zps


58294F26-DF14-43F7-B16B-8741C2F8EF2B_zps


C69C965E-78F3-45EC-A634-3681645FF0AD_zps


BD367A90-1FA0-4CD4-84EB-969293D97FC8_zps


And that's where im up to, im hoping to make good progress this summer, once the front is back together I will be doing similar to Tom on the underside at the rear, I have made a start but got side tracked! Im building the front end up again now, gradual progress but I will try and do regular updates.

Share this post


Link to post
Share on other sites
2052NV

Wow awesome work!

Share this post


Link to post
Share on other sites
acox99

Thankyou, here it is as if last night, managed to get some of the bulkhead furniture back in,the rear brake compensator, heat shields and gear lever linkage. I'm trying to retain a bit of it original character, I don't want everything to look new hence the master cylinder and servo unpainted. The new brake pipe and fuel line clips arrived yesterday along with speedo cable and pedal rubbers, so next job is to make up some new brake pipes and refit the subframe, and start building up the front suspension.


Before


277E46A2-1741-458B-A4DC-6A51A5E40F0F_zps


After


4C995E7B-4696-493E-A54B-06033B9858BF_zps

Share this post


Link to post
Share on other sites
Weser

Looking good! I love a Laser.


Like the Bay Window camper too. Are we going to see a build thread for that :lol:

Share this post


Link to post
Share on other sites
rallyeash

Good work, Bay window for sale?

Share this post


Link to post
Share on other sites
acox99

Haha the bay is a friends, she has everything to do it but it just sits there. She also has a mk2 golf gti and a 69 beetle that are in the process of being done that are way in front if the bay. She won't sell anything.

Share this post


Link to post
Share on other sites
Juttie205

very nice and looks great but would have cleaned and painted brake servo before refitting seems to stick out in clean engine bay

Share this post


Link to post
Share on other sites
acox99

I didn't want to paint everything, loses the originality of the car, I don't mind patina, the engine won't be painted, and I can't re plate the servo easily, and it would be hard to match the original green plating/ coating

Share this post


Link to post
Share on other sites
jord294

Keep up the good work :D

Share this post


Link to post
Share on other sites
acox99

Made the most of the day assembling the front end. It was all painted previously so was a kit of bits. Fitted my anti roll bar drop link entensions, fit perfectly and take the strain out of the drop link and stand it upright like they should be.


EA02717D-184B-44A9-AF3E-B4DB96785D30_zps


FE031145-ED3F-4366-B10C-7AB310EFA9DD_zps


6412B4E6-F631-4C8B-AFDB-8574171DC800_zps


BEF9B3B3-576F-4C37-AD7F-61653C03F535_zps


I wanted to make a start on brake pipes but a lack on enthusiasm and tube nuts put a stop to that.

Share this post


Link to post
Share on other sites
acox99

Just a quick update, brake pipes are in and finished, and the car is now back on its wheels.


8A97583A-B836-47AB-821C-C3E3D60931A4_zps


902424CE-0F2C-469B-9104-B4AB62014C2B_zps


The engine bay is as far as I can go for now, lack of funds means I can't get the engine done and in, so for the time being the rear half of the interior has come out to inspect the rear seat wells. As expected I will need to pull the tank out. I did pull the carpet up and look in the footwells and there is no sign of any rust and it's nice and dry so that's a positive. The boot floor is also rot free.


5FF36016-34A0-4F78-9C71-5C2ADB29D073_zps


E46B6EF2-79E5-49FC-B461-C31FC61FC476_zps


003C39DB-8AD4-47BC-93EC-DFF60108BDB0_zps


But as the weather is good I have popped the screen out to sort out crusty bits I could bee under the rubber. I think it's going to be a nasty area to repair. 2 holes so far and some very thin metal. Should be fun! I will look further today and possibly try and save as much of the area as possible.


2ECBE057-9A26-4E23-B52D-B751C6CE087A_zps


The rest of the screen surround isn't too bad just a couple of scabs. I imagine this is damage from a new screen being fitted as it currently has a non sunroof rubber. I have sourced a descent rubber with the lip that it will be going back with.

Share this post


Link to post
Share on other sites
acox99

Little progress was made today due to the weather. But I did have a chance to go to a breakers yard and look at rear window seals. Mine have leaked for a while where they have shrunk and as it appears impossible to get replacements I wanted to find something suitable to modify. I ended up getting a pair of descent Saxo seals for a fiver.


The seal is a different profile but I'm not concerned by that. There plenty big enough so I pushed it in the corners, cut, and stuck it back together with super glue. (Works a treat) re-fitted it and put the window back in. There is plenty of pinch on the rubber when the window is shut, and is water tight, all in all a cheap solution to the problem which doesn't look out of place at all.


Old rubber


C878620C-E645-45AA-AFE6-05F73EB496AD_zps


New one made up


85D8DE78-206C-40C6-A0FE-79DD77ABF008_zps


In the car


9A6034DD-217A-4F88-8AF8-BB645433F0B9_zps


E2878A53-2E92-45B2-BA9D-74F750697719_zps


73711EC3-7196-4C88-BB59-C3BA583D12C4_zps

Share this post


Link to post
Share on other sites
acox99

It's ages since I updated this thread so I thought I had better show a bit of progress. I have a deadline I want to get it done for now, 10th October hot hatch Sunday.


While the weather has been good I decided to pop the screen out. I wanted to sort out the rust issues, and change the screen rubber to the correct sunroof rubber. I spot blasted the affected areas, welded a couple of pin holes, filled, primed and painted. I blended it back halfway along the roof and right down the a post. It looks ok. Not perfect by any means but is presentable until I have the funds to do it properly.


2ECBE057-9A26-4E23-B52D-B751C6CE087A_zps


6212F28E-24D5-4D9B-80CD-FCA3042B4189_zps


C1DDA4A3-D49E-4855-A3E0-D0B94FEE369E_zps


It was then a case of finish the underside. I removed the tank, beam and rest if the brake pipe, cleaned, primed, seam sealed, light stonechip and today I did the final top coat and painted the rear arches.


31FF0860-DE5A-42AD-B393-743AA792AE38_zps


56F21A04-B2AD-4F2D-80C7-56222D171534_zps


506E3692-AF17-48B3-9996-09E4E0167D50_zps


BB33FFCE-B755-40F9-8C79-99F9923BF1F0_zps


E5928EB2-1CFB-4A75-A314-00BEE1D52159_zps


613992EA-AD27-432F-B4E5-2D2EFE66E348_zps


E231E525-F1DE-4660-B4CC-64B76E569DB9_zps


These are the products I used, use these on every underside that we do. Great results easy to use and long lasting.


2CB6D429-3BE9-4AF6-A5A1-6756AAD9EA66_zps


I took a leaf out of ATK's book and freshened up the sunroof channels just got to do the rear wiper nut.


5C22D419-1CEE-48EC-8EB2-6DA81BBC9DDA_zps


Started re fitting the rear bumper today. The rear beam will have to go back how it is for now until I have the money to get it rebuilt. But I'm excited to be at a turning point with it.

Edited by acox99

Share this post


Link to post
Share on other sites
credowan

Your doing a great job with the car mate it's looking great, hopefully see it at Goodwood or a meet when it's up and running


Keep up the amazing work mate

Gary

Share this post


Link to post
Share on other sites
m@ttc

Nice work mate, I'm in the process of doing the underside on mine which is taking ages, your shell looks in better condition than mine but I'll get there, so watching your progress with interest.

How have you found your Saxo seals to be?

Share this post


Link to post
Share on other sites
acox99

Thanks a lot. The shell wasn't too bad. Not a lot of bad rot. Just scabby in areas. Some if the pictures of other peoples cars made me realise how good it was! It's been off the road 4 years so that helped it a lot.


They seem to work well. They look the same on the inside as the rubber has the same texture finish as the plastic. They fit tightly into the corners as I made them to suit the car, they have a good pinch in the window, and they passed the hosepipe test and all the rain from over the weekend. The old seals where shrunk and leaking, I needed to find an alternative as nothing new is available, and after all the work I've done to the car it still had leaky quarter windows. Originality freaks won't like them as the rubber section is different, but they do the job well so I'm happy.

Share this post


Link to post
Share on other sites
acox99

Made some descent progress yesterday. Fitted freshly painted rear drum back plates, new wheel cylinders and shoes with new fitting kits, Made up the rear brake pipes, refitted fuel lines, re fitted fuel tank and handbrake cables. I took the decision to refit the beam without painting it as I will remove it to refurbish it next year.


4EF26F68-3C1A-46D6-982E-B04ED0B4D6B2_zps


EA153A89-2D6F-4E2F-9A44-98B782573920_zps


DC6714AB-6A8B-433F-B34D-52D31C358EB1_zps


82763B94-46B3-49E4-A4C7-5EF806010F86_zps

Share this post


Link to post
Share on other sites
acox99

Slightly annoyed that where it has been on a 2 post ramp the pads have taken paint off the sill on the rear or the car. Next jobs are to fit new rear dampers. Change over the rear beam mounts as they sent the wrong ones initially, fit spare wheel holder, get some new rear hub nuts and start detailing the engine ready to refit, finish off mopping the paintwork. Wet flat and paint the last wheel.

Share this post


Link to post
Share on other sites
lewis205cti

Looking amazing mate. One of the best colours too.

Share this post


Link to post
Share on other sites
Rolando

is that body sealant and red primer brush on? looks really good!

Share this post


Link to post
Share on other sites
acox99

Yes both the sealant and primer are brush on not cheap. You can buy it on eBay. But it's very good stuff, and wurth are a well known brand in the trade. Thankyou for all your great comments.

Share this post


Link to post
Share on other sites
acox99

After cleaning the engine and box with degreaser and an further cleaning them with an alloy deoxidiser made by race glaze the engine and box where looking loads better. I bead blasted a the individual alloy pieces and sprayed them with WD40 to keep them from going white with corrosion. The aim wasn't to make it look new. I just wanted it to be presentable as it wasn't a rebuilt engine, I detailed it with new nuts and bolts and gaskets and seals, and blasted and painted the gearbox end cover to finish it off. I must admit it came out better than I thought.


2582E803-4889-413A-849F-53CEA224282C_zps


So today was a big milestone. I refitted the engine back into the car and started reconnecting. I can't quite remember how all the wiring was laid out around the brown plug and how all the wiring sat by the fuse box and the rad temp switch. I bunched them up and kept them out the way.


938D375B-7AB5-40D9-8D5A-15F44583F2E8_zps


So this it what it looks like now. I need to write a list of finishing jobs. But I did put my order in today with BBM for rubber hoses stainless water pipe and gear rods.

Share this post


Link to post
Share on other sites
Andy_C

Good progress. Lighter colours show off the hard work way better. When I started on the underside of mine it'll never look as good.


What exactly did you do to the Saxo seals? One of mine split yesterday so need an alternative solution.

Share this post


Link to post
Share on other sites
Reebmit

Looking really good, well done, I have to admit the Lasers do look good.....

Share this post


Link to post
Share on other sites
acox99

Andy_c I cut them just before the corner, pushed the seal into the window appature, cut it using descent snips as they have a metal back bone running through the seal. Then chamfer them at 45 degree angles facing inwards. Fit them back in the car, and cut the forward face to suit. Making sure both 45 degree joins mate up well with no gaps super glue them and hold them until it goes off. If it helps do the seal face first then once it is dry glue the inside edge as it can be a pig to hold. It gives you a bit of give on the rubber if the joins aren't perfect. Or alternatively use a glue/ sealant of your choice.

Share this post


Link to post
Share on other sites

Create an account or sign in to comment

You need to be a member in order to leave a comment

Create an account

Sign up for a new account in our community. It's easy!

Register a new account

Sign in

Already have an account? Sign in here.

Sign In Now
Sign in to follow this  

×