Jump to content
  • Welcome to 205GTIDrivers.com!

    Hello dear visitor! Feel free to browse but we invite you to register completely free of charge in order to enjoy the full functionality of the website.

Sign in to follow this  
fliprio

[Race_Prep] Sprint/hillclimb Gti-6

Recommended Posts

fliprio

A rear end shunt back in August made me have to think about keeping or writing off the car and taking the cash or getting it repaired. Final decision was to repair it and at the same time grab a copy of the blue book and look at the specs for sprints/hill climbs.


post-16234-0-00948800-1360493551_thumb.jpg


The spec of the car was

· 306 GTi-6 2.0 16v XU10 engine conversion, running twin 45 carbs and standard distributor

· 306 GTi-6 6 speed BE3 gearbox

· Maniflow exhaust system

· 306 GTi-6 283mm brakes

· AVO Coilover Adjustable Suspension with adjustable rose jointed top mounts

· Safety Devices C12 rear roll cage, roll-over bar with a fixed diagonal, bolted in

· Engine strut brace

· Yokohama Prada spec 2 tyres

· Corbeau Bucket seats & 4 point harnesses, interior fully stripped


Upon joining the local motor club and some advice from a friend who works for the MSA, the car will run in the Sports Libre car category because both the Road going production and Modified Production categories require the block to “be externally identifiable as that fitted to the original model or specified option”. This will mean it’s not competitive, but I’m just in it for a bit of fun at the moment. First sprint is the 14th of April, so I better get a move on.


The main things that I needed to do, are to upgrade the roll cage to 6 point, 5/6 point harnesses and add the timing strut and usual stickers for the ignition etc


Share this post


Link to post
Share on other sites
fliprio

First is to repair the back end. Most of the floor and rear panel pulled back out quite nicely, quite a few local places wanted to charge a small fortune to cut the whole rear end out, but it’s fairly straight now. A few brackets and bumper mounts needed re-welding.


post-16234-0-86389800-1360494204_thumb.jpg


post-16234-0-20675900-1360494219_thumb.jpg


New bumper and mounts were put on, I decided to go with a smooth tailgate, and it had to be re-sprayed as finding one in the same white was a pain


post-16234-0-74825900-1360494281_thumb.jpg

  • Like 1

Share this post


Link to post
Share on other sites
fliprio

The original bonnet was never very good and had to be raised as the manifold sits the twin 45s at a strange angle. Despite the recommendations not to, I got myself a Magnum motorsport humped bonnet. As per everyone’s advice the quality of the bonnet was c**p, it had what the guy at the bodyshop described as ‘fried eggs’ all over it and was very thin. With the 4 Aerocatches, the actual fit on the car was quite good


post-16234-0-48554200-1360494517_thumb.jpg


The bonnet needed some major filler work, but to stop it cracking, some aluminium rod was fibre glassed in on the underside to strengthen it up


post-16234-0-12831700-1360494564_thumb.jpg


Finally, I had a go at spraying it myself, first time doing it and in 2K it looks quite good, only a small amount of orange peel in the centre which will come off with a bit of compound.


post-16234-0-42060300-1360494606_thumb.jpg


I also did the sunroof cover panel while I was there as it was just a bare bit of aluminium before, just using an IR dryer to make it go off nicely


post-16234-0-65204900-1360494612_thumb.jpg

Share this post


Link to post
Share on other sites
fliprio

I got myself some bumper vents from Xcross racing in Basingstoke, they fitted into the bumper nicely, but the hole is on the wrong side, the bumper has some metal plates behind it in this area so you can’t get any pipe work onto it. They were kind enough to give a full refund.


post-16234-0-63599900-1360494747_thumb.jpg


Share this post


Link to post
Share on other sites
fliprio

Harnesses in, got a great deal from Rally designs, £85 each with free postage


I need to find out how a remove the crotch strap for using it on the road


post-16234-0-60582500-1360494869_thumb.jpg

Share this post


Link to post
Share on other sites
fliprio

Trial fit of the roll cage, Andy Baker at AB motorsport sold me the front section only which was useful, it was the last one left from any of the SD distributors and would have been a 2-3 month wait otherwise!


post-16234-0-53481700-1360495015_thumb.jpg


Share this post


Link to post
Share on other sites
aarontrophy

looks really good mate liking the bonnet :)

Share this post


Link to post
Share on other sites
fliprio

looks really good mate liking the bonnet :)


Thanks, its still not perfect, but good enough. Will get some pictures of it on the car soon.

Share this post


Link to post
Share on other sites
fliprio

Roll Cage mounts welded in, I think I will need to paint the rest of the floor, the 2K brushes on quite nicely


post-16234-0-94108700-1360615379_thumb.jpg

Share this post


Link to post
Share on other sites
JakeMathias

Looks good ! I'm considering going with a smooth tailgate on mine. Is that an auto bonnet you've got there ?

Share this post


Link to post
Share on other sites
fliprio

cheers, i wasnt sure about the tailgate at first, but I kind of quite like it now.


No its not an auto bonnet, its a Magnum motorsport fibreglass bonnet supplied by http://ramsport.com/ the hump is at the front as apposed to an auto bonnet where its towards the back

Share this post


Link to post
Share on other sites
fliprio

Refurbing some 1.9 alloys over the weekend to go with the A048s, most of the curbing marks have been filled or sanded out.


post-16234-0-24709900-1362333795_thumb.jpg


post-16234-0-41580100-1362333843_thumb.jpg


Share this post


Link to post
Share on other sites
fliprio

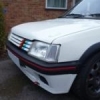
Front end finished off


post-16234-0-29853300-1363814513_thumb.jpg


Share this post


Link to post
Share on other sites
fliprio

new badges and wheels finished off


post-16234-0-53688900-1363814676_thumb.jpg

Share this post


Link to post
Share on other sites
fliprio

post-16234-0-16912600-1363814794_thumb.jpg


The one last thing to do is to make up the timing bar/plate on the front, anyone got any good pictures of where they have attached theirs?

Share this post


Link to post
Share on other sites
aarontrophy

Looks really good :)

Share this post


Link to post
Share on other sites
fliprio

Thanks :-)

Share this post


Link to post
Share on other sites
fliprio

Doing something a bit different with some C5 alloys


post-16234-0-88884700-1377544670_thumb.jpg

  • Like 1

Share this post


Link to post
Share on other sites

Create an account or sign in to comment

You need to be a member in order to leave a comment

Create an account

Sign up for a new account in our community. It's easy!

Register a new account

Sign in

Already have an account? Sign in here.

Sign In Now
Sign in to follow this  

×