pugpete1108 62 1 Cars Posted April 10, 2009 got two wires left when connecting up the alternator, obviously i've connected the main power to the battery but not really sure where the others go you just see them in the bottom of this pic: i think its the blue and brown ones, there is only one connection left on the alternator so one of them looses out Share this post Link to post Share on other sites
grandos 16 Posted April 10, 2009 If its the same a a standard GTI it'll be the following wires in that area: Battery to alternator and starter motor wire (large gauge) Oil Pressure sensor wire Another oil presssure sensor type thing wire Starter activation wire Alternator signal wire (probably goes to cluster if faulty) Share this post Link to post Share on other sites
pugpete1108 62 1 Cars Posted April 11, 2009 i got both the oil connections and both the alternator and starter connections so i guess it will be the alternator signal wire then, the question is which one...hmmm best get out the haynes then. Share this post Link to post Share on other sites
pug_ham 245 3 Cars Posted April 11, 2009 Starter solenoid wire is usually a pale blue #46b & iirc the alternator wire on my loom is brown, wire # 7a. Graham. Share this post Link to post Share on other sites
pugpete1108 62 1 Cars Posted April 12, 2009 yeah i found out through the haynes that it was 7a but seing as most of my wires dont have numbers on them i wasnt relying on it. brown wire it is then. its only a warnng light on the dash anyway isnt it? Share this post Link to post Share on other sites
welshpug 1,682 Posted April 12, 2009 not quite just a warning light, its the excitor wire, without it the alternator won't start to charge until the engine is over a certain rpm, around 3k IIRC? Share this post Link to post Share on other sites
kennygti 0 Posted April 12, 2009 just removed the alternator on my 1.9 8v today and all i had on the back of mine was the large guage and a yellowy orange wire with a yellow spade connector which went to the top left if lookin from the rear of the alternator in situ. May help??? Kenny Share this post Link to post Share on other sites
happygoron 2 Posted April 16, 2009 Ok, just fitted my new/recon standard 205 gti alternator and having a similar confusion. There's 3 terminals on the back of the alternator, one marked B+ (Which I assumed was battery +ve), one marked B- (similar assumption made but -ve!) and a male spade connector that is unmarked. I took two wires off the old (306/405/etc.) alternator, one red which connects to the +ve on the battery and one brown which I assumed to be to earth or something but know know to be to the multiplug. As the old alternator was different I cannot go by the connections on the wires so which two connections to these wires go to? I currently have the red on the B+ and the brown on the B- with no connection to the spade, am I understanding from this thread that the red to the B+ is right but the brown needs to have a spade connector on it? Share this post Link to post Share on other sites
pugpete1108 62 1 Cars Posted April 16, 2009 Ok, just fitted my new/recon standard 205 gti alternator and having a similar confusion. There's 3 terminals on the back of the alternator, one marked B+ (Which I assumed was battery +ve), one marked B- (similar assumption made but -ve!) and a male spade connector that is unmarked. I took two wires off the old (306/405/etc.) alternator, one red which connects to the +ve on the battery and one brown which I assumed to be to earth or something but know know to be to the multiplug. As the old alternator was different I cannot go by the connections on the wires so which two connections to these wires go to? I currently have the red on the B+ and the brown on the B- with no connection to the spade, am I understanding from this thread that the red to the B+ is right but the brown needs to have a spade connector on it? yeah i have the same problem as the brown (7a) had a spade connector on it and the alternator had a ring connector (must be a new alternator to what i took off the car ???) i've connected the big wire (battery pos) to the big ring on the alternator and changed the spade connector (7a brown) to a ring one and connected it to the small connection on the alternator not sure why you have three connections as the alternator earths through the case iirc Share this post Link to post Share on other sites
happygoron 2 Posted April 17, 2009 yeah i have the same problem as the brown (7a) had a spade connector on it and the alternator had a ring connector (must be a new alternator to what i took off the car ???) i've connected the big wire (battery pos) to the big ring on the alternator and changed the spade connector (7a brown) to a ring one and connected it to the small connection on the alternator not sure why you have three connections as the alternator earths through the case iirc I think I have to do the opposite to you and put a spade onto the brown wire as it was a ring before on the old (different design) alternator. Seems to make sense looking at the haynes wiring diagrams too (their photo of the alternator wiring is as much use as a chocolate fireguard). Share this post Link to post Share on other sites
Adamstanford 3 Posted August 23, 2019 On 4/16/2009 at 9:45 PM, pugpete1108 said: yeah i have the same problem as the brown (7a) had a spade connector on it and the alternator had a ring connector (must be a new alternator to what i took off the car ???) i've connected the big wire (battery pos) to the big ring on the alternator and changed the spade connector (7a brown) to a ring one and connected it to the small connection on the alternator not sure why you have three connections as the alternator earths through the case iirc So do you need a wire to the b- terminal? Mines the same. Brown with spade, red to b+ Share this post Link to post Share on other sites
dt_ 7 Posted August 30, 2019 It's funny that this thread got bumped because I'm having a very similar problem. What's happening for me is the alternator isn't exciting, therefore not charging the battery, but there is NO battery charge light illuminated at all, even with ignition on and engine off, hence me driving around til the headlamps got dim and the car cut out (luckily it lasted exactly long enough for me to get home). A bit of research tells me that the exciter wire (little browny yellow connection on alternator) runs through the dashboard via the battery light bulb and onto the battery, to register some kind of current consumption that tells the alternator it needs to start charging. Previous to this I have been having a very very dim charge light illuminated on the dash occasionally, made worse when the blowers, lights etc were on. One daylast week it slowly lit up fully, so I drove back home. The next day, the light was out, so I continued driving, resulting in the above problem, but with no warning. Since changing to a new battery I can still start the car and it will run fine, but voltmeter only displaying battery voltage. I revved it to about 5000rpm and then alternator was giving 14-14.5v, so it seems good also. So far I have: Changed the battery to rule it out (was an old one anyway) Removed dash and dials to check the bulb continuity, all ok Checked 10a fuse #1, all ok So it must be either a break in the wire, or a problem with the brushes/voltage regulator. I'm stumped from here, I've grounded the exciter wire to the slam panel and still it will not light. Should I be leaning more toward a wiring issue? Any help appreciated Engine is xu51c Share this post Link to post Share on other sites
Tom Fenton 1,582 Posted August 30, 2019 Chances are it is a bad connection on the brown multiplug in the engine bay that carries the sensor and alternator, starter, thin gauge wiring. Have a search its been done to death on here before! Share this post Link to post Share on other sites
dt_ 7 Posted August 31, 2019 Ok cheers for the info. I've been searching, but I have 2 smaller brown multiplugs, not 1 larger one like most others seem to describe (images 1+2, plug near battery is looking incredibly tired) and there's also a random green spade connector that also fits the alternator (image 3). None of the wires in either multiplug match the colour of the exciter wire. Resistance between battery negative and brown alternator exciter plug is coming out at 20 ohms, is this the problem Share this post Link to post Share on other sites
Andy 105 1 Cars Posted August 31, 2019 The alternator rotor exciter is connected to12v live via the 2w warning light on the dash . The resistance of this lamp is 72ohm cold , allowing a small current to flow to the rotor with ignition on. This energises the rotor, enabling the alternator to begin to produce a voltage from its field coils. This voltage is fed back to the rotor, so self energising the rotor as shaft speed Increases . As the pd rises to above 12v, the warning bulb extinguishes as the alternator p.d exceeds the battery terminal pd and charging begins. So, if you disconnect this feed wire from the alternator, switch on the ignition, you should read 12v on this feed wire . If you now ground this wire, the warning light on the dash should come on . Try this first . If you get 12v and then a lit bulb, the wiring is probably o.k and therefore suspect the alternator ( although it showed 14v so sounds o.k ) Andy 2 Share this post Link to post Share on other sites
dt_ 7 Posted August 31, 2019 So I tested the wiring, and it's near as damnit 12v when ignition is on. Exciter wire grounded and light is illuminated (must have done this wrong last time somehow). Revved the engine to 4000rpm and the voltage across battery shot up to 14.3v and the revs dropped slightly however the alternator was making a front squeaking sound that went away after about 10-15 seconds. Ran engine for about 50-60 seconds in total, and the alternator was warmer than the rocker cover, maybe the alternator has given up, is it meant to get warm that quick Share this post Link to post Share on other sites
Andy 105 1 Cars Posted August 31, 2019 The squeaking noise was probably the belt slipping as the load on the alternator increased . Wiring checks out but the alternator should heat up mainly only via conduction of heat from the engine, so heating up like that after 60 secs suggests regulator failure , resulting in high current generation and consequent heat . Further , 14.3v is rightat the top limit , again suggesting that the alternator was producing maximum output . Do you have a spare alternator to try, as I think the one you have is suspect . Share this post Link to post Share on other sites
dt_ 7 Posted August 31, 2019 I don't have a spare unfortunately, but the local motor factors has one in stock for me if necessary . Is it possible to buy and fit a regulator, or would the actual unit potentially be damaged/worn by the potential failing regulator and a new unit be the answer? Share this post Link to post Share on other sites
Andy 105 1 Cars Posted August 31, 2019 Yep. Look on your alternator for the code and then look on,one with that code for the correct regulator. I did one for an Mi16 alternator ( which is the same as the 8v gti and it cost less than £20 posted . Andy Share this post Link to post Share on other sites
Andy 105 1 Cars Posted September 1, 2019 Me again, I have just looked on Autodoc.They have a range of regulators for the 1.9gti depending upon which alternator you have . Go and have a look. At the low cost end, it could be as little as £5.00 , but make sure you know which alternator you have, as lots of variations were possible for the 1.9gti . Share this post Link to post Share on other sites
dt_ 7 Posted September 1, 2019 Thanks so much for the help. I've taken a picture of the regulator, but for a fiver, can't really go too wrong I suppose, a new alternator unit is £60. (Mine's a 1.6 auto carb), so I just need to get one that is at least 12v supply? Share this post Link to post Share on other sites
Andy 105 1 Cars Posted September 1, 2019 It needs to be one that will fit mechanically as well as electrically. Do a quick search on eBay with that regulator code and you will quickly find a whole range of suitable regulators . Shame you are so far away as I think Ihave a spare alternator you could try just to see if it solves your problem . Best of luck Andy Share this post Link to post Share on other sites
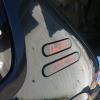
dt_ 7 Posted September 2, 2019 I searched for the regulator, and there's plenty of shapes and sizes that come up that relate to that part number, so I thought I'd have a look and see what condition the regulator is in, here are my findings: Might be quite hard to make out but there's about a millimetre deep groove on both slip rings, is this just general wear and tear? This is the brushes, showing uneven wear. Will I be best off with a new alternator with the condition of those rings Share this post Link to post Share on other sites
Tom Fenton 1,582 Posted September 2, 2019 Personally I’d buy a reman unit. For exactly the reasons you have found, if the regulator has failed and it’s an old unit then the chances are the rest of it isn’t far behind. 1 Share this post Link to post Share on other sites
Andy 105 1 Cars Posted September 2, 2019 Your wiring to the alternator appears to check out, suggesting that the alternator itself is at fault. The fact that it gave well over 14v suggests that both the rotor and field coils are intact but , because it got hot very quickly, regulation seems to be the culprit. The wear on the slip rings indicate that the rotor is past its first flush of youth . On that basis ,take Tom’s advice and shell out for a recon unit . Andy 1 Share this post Link to post Share on other sites