
Heater Fan Overhaul
So this weekend after getting annoyed just how cold it is in the car I decided to take a look at the heater fan, when I got the car last year I had to replace the heater matrix as one of my first jobs so I knew the lack of heat wasn't down to that nor the thermostat as that was also changed over Christmas when I had everything else out.
So before I took the old fan unit out I used my digital anemometer that I use for kite surfing and measured the output by closing off all but one face vent, set the fan to high and took a reading of just a measly 1.13m/second, with this I decided to give the blower an overhaul and along the way I took some photos on each step in-case anyone else wanted to do the same and try to increase the air flow from an old blower unit.
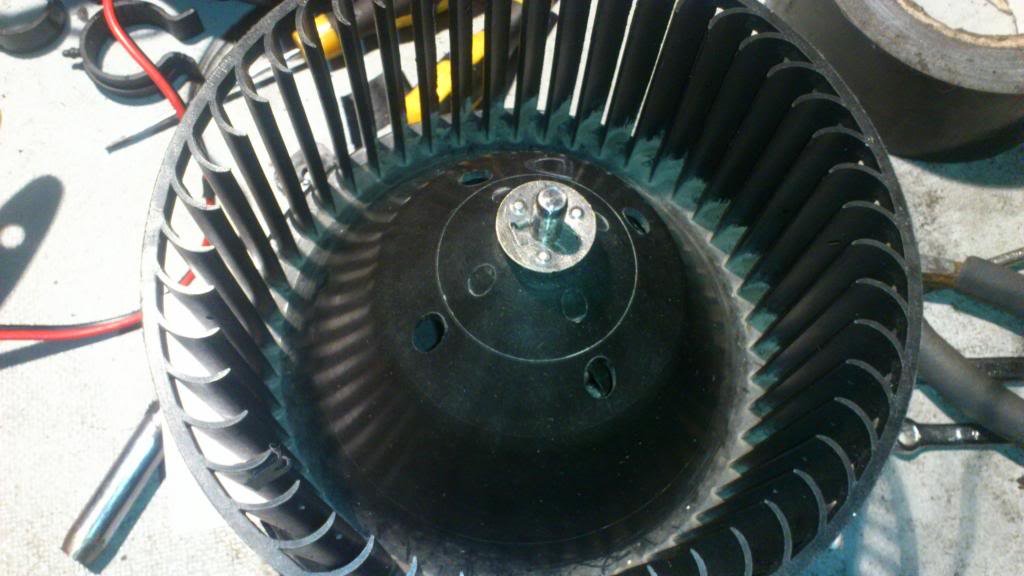
After removing the unit from the car I removed the fan blade unit by removing the retaining clip from the motor spindle, once this was off I sanded the motor spindle smooth with some P400 as mine was rough from the rust build-up, this is to ease the removal of the fan blades from the spindle unit.
Once the motor spindle was nice and smooth I used 2 screwdrivers on opposite sides and prised the fan blade assembly up the motor spindle, (mine was very seized up)
once it had got so far, 1/2 inch or so, i used some pliers to lift it the remainder from the spindle
once it was off I got two rolls of gaffa tape stacked up (pointless photo)
Then flip the motor housing upside down so the motor unit was above the void within the gaffa tape rolls then removed the rubber plug and two screws from the motor housing and inserted a small long socket into the hole where the rubber plug once was
then firmly tap the top of the socket to push down and out the motor unit from the casing, watch the wire that enters the casing, you may need to push it in as you knock loose the motor unit, then voila its out, its surprising just how much rubbish there was in there!
make a note of which way around the wires are connected, on my unit there was a green trace on the terminal itself and also a green sleeve on the respective wire
I then used a soft brush to remove all the muck from on and in the motor
it was quite surprising just how much had built up in there from the last 20 or so years
next, carefully remove the clips from the motor brushes on either side using a screwdriver
but watch out for the springs inside as they are not attached to the brushes inside
once the springs are out withdraw the motor brushes from their guides, i used a screwdriver under the brush lead to slide it out
you may notice scouring on the surface of the brush
I then lightly sanded with some very fine sandpaper the surface of each brush, if you do this ensure to keep the radius on the face of the brush the same as it was before.
once both were clean, I then used some cotton buds dipped in carb cleaner and cleaned each contact within the brush opening on the motor spindle by turning the motor by hand, this is to remove the carbon build within the motor, once this was done I slid each brush back in with its spring and clipped it all back into position, then using a power supply I connected the motor up and let it turn slowly for 10 mins (4v), this is a good time for a cup of tea, coffee or whatever your poison is, during this I occasionally sprayed silicon grease onto the top and bottom bearing and allowed it to work its way in, you may notice black goo coming out of the bearings, this is just the crud that needs to come out, I just kept adding more spray grease until it starts to run clear
next before you put the motor back into its housing go and clean the motor housing and the fan blades, washing up liquid and a pipe brush worked well to clean it all up, once this is all clean and dry check the motor spindle to lateral movement, if there is any play this can be corrected by putting the top of the motor spindle on a hard surface and using a 7mm socket to drive down the bottom bearing retainer clip a little, then apply a good amount of copper grease to the bottom bearing work it into the bearing and insert the motor into its housing, watch you don't twist the wires as it goes back in.
flip the unit back over and apply more copper grease to the top bearing and also work it in, then align the two screw holes within the motor to the motor casing and screw it all up and reinsert the rubber plug, once you have done this get some cardboard to use as packers to ensure the fan blades do not rub on the motor housing and slide the fan blade unit back onto the spindle and push down fully until the cardboard is trapped, don't remove the cardboard yet!
with the cardboard still in place, next slide on and align the tabs of the fan blade unit retainer clip with the holes within the fan unit and drive home the clip securely with a socket into the fan blade unit
once this is done turn the fan by hand to remove the cardboard packers and you should be left with a gap like so
after this the unit is finished and ready to be re-installed into the car, if you also wish you can swap out the brushes for new ones, but just cleaning and re-greasing all the bearings made a massive difference, so much so the fan output went from 1.13m/second to over twice that at 2.78m/second, needless to say its nice and toasty in the car now and I'd even say it runs quieter!

