-
Welcome to 205GTIDrivers.com!
Hello dear visitor! Feel free to browse but we invite you to register completely free of charge in order to enjoy the full functionality of the website.
Search the Community
Showing results for tags 'refurb'.
Found 6 results
-
I’m not sure if this is being posted in the correct place. Thought it may be of use to someone. I recently had an issue with my inside door pulls and some success with repairing them. I wanted to share it, in case it proved useful to anyone . The 205 door pulls as you know, have inside them a metal skeleton surrounded by foam, all encased in a PVC /Laminate type skin. After years of use and being yanked on the foam starts to part from the PVC skin, it distorts and looks like it’s bursting open a bit. The foam inside both my door pulls had started to separate from the outer skin and the metal skeleton. This allowed the ends to flare and bulge out of shape. I wanted to try repair them instead of simply replace. I found a company online that manufactures a 2 part liquid which expands into an adhesive foam. They make and sell it primarily for movie sets to make props such as foam weapons etc. After speaking to them, I went ahead and bought their smallest kit , 500ml. In preparation, I made a small wooden jig to brace the door pull in. This squeezed the handle into the correct shape and position, holding it all in place ready for me to inject the liquid. I removed a generous amount of the original foam to allow space for the new liquid/foam to fill a decent void and to give it more surface area to adhere and bond to. To prevent this liquid/foam going everywhere I used a bit of masking tape and taped up the edges. With the handle secure in the jig, I mixed the two parts together and using a large 100ml syringe I injected the liquid into the void. BEWARE that once mixed, the chemical reaction takes about 30 seconds to begin - the liquid begins to heat up fast and then starts to foam. Leave it to foam and do its thing and allow to dry overnight and then trim off any excess using a Stanley blade. My door pulls are almost as good as new ! Packed out with foam and back in their original shape. I suggest doing a decent sized test patch before you commit to using it for the real repair, maybe into an aerosol lid or something. This way you have an appreciation for the foaming ratio and the speed of the reaction. Also make sure you mix the two liquids together extremely well and be quick ! I hadn’t planned to put up a post about this so apologies for the terrible photos. Hopefully it’s useful to someone out there . The link for the product is : https://www.mbfg.co.uk/black-gun-foam.html They do large quantities but the smallest 500ml kit is ample for small repairs .
-
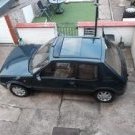
Hello all, It's been a while since I posted here and sadly since my 205 was last on the road. I haven't lost touch though and I've been keeping up with a few threads, especially since the East Midlands meet disbanded. Having sat in the garage for a number of years I have decided, with a lot of inspiration from Michael's thread and Paul's thread that this is the year I need to crack on and get the car back on the road so this is my refurb' thread. These are the last couple of decent photos I have going back to 2011 and 2013. I'm not going for a full restoration or respray as the car is basically sound and I want to keep some of the original character but I need to clean her up and do her justice. My mantra is "the devil's in the detail" and no square centimetre will be left untouched by way of being cleaned, treated and protected :-) I've had a few Saturday afternoons and evenings on her so far and today she looks like this. As is visible, there's rust bubbling through at the front of both rear wheel arches, underneath the cover there's a substantial amount of blooming on the roof and bonnet and the trim has faded. There's also a fair amount of surface corrosion in the usual places around the engine bay such as under the headlights and around the battery tray so I'm prioritising getting the engine and gearbox out so I can assess the damage properly. The radiator core is shot it and there's a crack in the exhaust manifold but I'm yet to see how bad this is. Internally all of the seats have holes in the cloth, the foams are pretty crappy and the bracket that holds the driver's seat outer bolster in place has snapped. It's a real shame I've let her get into this condition :-( Good news is that the last time she was on the road I did some work on the interior by way of replacing dashboard bulbs, fitting a Toad Ai606, fixing the standard retro-fitted central locking and I know the carpet is in good nick. All the glass is fine and the sunroof is in good working order (tested when I backed her onto the drive last month) and the only advisory on her last MOT was that the front coil springs have surface corrosion. So, for a DIYer I don't think there's anything that will stop me getting the car back on the road and MOT'd but I want to do a good job of refurbishing her fully so I'm going beyond the minimum required - planned list of jobs as follows: Remove the bonnet. Get on all the stuck fixings and finish clearing the engine bay ready for engine removal. I'm currently struggling with; a destroyed screw head holding the washer bottle into the inner wing, not being able to get onto the rearmost battery tray bolt head, four round nuts on the exhaust manifold, and figuring out if I can detach the exhaust manifold from the down-pipe and lift it out with the engine for splitting later. Remove front bumper and valance. Remove engine and gearbox and put to one side for a bit. Remove brake servo and anything else I can from the firewall. Remove front sub frame and put to one side for a bit. I am not planning to fully remove the wiring looms but I will be cleaning every single connector and doing as much testing as I can while I have the engine out and everything unplugged. De-grease, pressure wash and rub down the entire engine bay and front end and assess just how far the corrosion may have gone. Treat any corrosion, prime and respray any bits that need it. I'm not going to respray the whole engine bay as I want to keep the original stickers and I don't want to have to mask these off etc. so I'll be feathering what painting I need to do into the original paint. By the looks of it, I'll only be painting in areas that won't be visible once I've re-assembled anyway. The entire engine bay will then get a fresh coat of lacquer and protection (whatever that may be) and I am planning to do some nice bits such as polish the VIN plate and I think I'll lacquer over the stickers to help preserve them further. The front sub frame will be next - checking of all the usual parts and of course replacing the springs along with anything that looks like it needs to be replaced. I'll also be painting/treating (with Waxoyl, Hammerite or similar) everything that can be so it all looks really smart and is protected. The same will happen to the engine and gearbox. I don't want to take the head off as I'm not that that confident and the head gasket has never leaked. The engine also runs really well with a good idle and it's really spritley (it still kicks my wife's 206 115 HDI FAP's ass and our new 2008 115 e-HDi!) so if it ain't broke I'm not gonna fix it. However, I will replace the obvious bits (timing belt, water pump, tensioner) and no doubt I'll uncover some stuff I'll need help with that may lead to me taking the head off but we'll see. I also have a new alternator ready to fit as the previous one is really old and from a 306 DTurbo so it's over-rated and I want to go standard as I won't be re-fitting the boy-racer ICE I once had in the boot. I'll get the crack welded up in the exhaust manifold and all external surfaces on the engine, gearbox and exhaust manifold will be prepped and painted with whatever's suitable/tasteful before being put back in along with the sub-frame. It will then be a case of repeat at the rear. While I've got the wheels off I'll also be rubbing them down and freshening up the lacquer, refurbing brakes etc. and just getting her really clean and well protected. I am planning to go off piste a bit and fit a nice set of silicone hoses and I'm thinking about stiffer suspension bushes, just to liven her up a bit but I won't be lowering or messing with the standard geometry. I'm also going to to investigate radiators as I need one anyway so I might go for a smarter looking ally one but haven't decided yet. It's likely I'll need a professional to refurb the seats and deal with the rear wheel arch rust - these will be the finishing touches. I believe I'll be able to correct the blooming by rubbing back the lacquer which will release the trapped moisture and I will be able to re-lacquer the roof and bonnet and cut the fresh lacquer to blend it in with the old. A good clean up and treatment will see the trims right along with some new finishers from the classic spares list. I've already purchased some new front indicators and yellow Denji driving lamps. They won't get fitted for about a year but they look lovely in the boxes! So plenty to do - this weekend I'll be getting her up on stands (I needed them last weekend when doing my wife's brakes ahead of MOT on Saturday morning) and I'll be removing the driveshafts from the gearbox and getting on those stubborn fixings so I can hoist the engine and gearbox out over the next Bank Holiday. One mistake I have made, that I don't mind sharing, is parking the car in gear and subsequently removing all the gear linkages meaning I can't roll her around on the drive now until I've removed the driveshafts from the gearbox so it will be a tight squeeze this weekend but I should be able to manage :-) Plenty of updates and more mistakes to come. Wish me luck. Ian.
-
Hey all, Hope everyone's ok and had a good Easter. I want to refurb the 14" standard wheels on my 1.6 and was considering following the many guides by shot blasting and painting them but the centres are polished/diamond cut. Does anyone know if there any specialists that can refurb them whilst keping the polished/matt finishes as they are or if there is a way for me to do them whilst retaining the original look please? Cheers Ian.
-

Any Recommendations Where To Get My Be3 Gearbox Rebuilt?
Danez posted a topic in Gearbox & Drivetrain
Alreet, My gearbox has made driving my 1.9 gti miserable. Crunch in second, can't enage first 80% of the time, same for 3rd and now can't get it into reverse at all. (Even when I put it in second then reverse, that's long been my technique) so i'm going to get the gearbox rebuilt. I wanted it doing anyway so might as well do it now considering I no longer have reverse. Any reccomendations to who would do it? pref in lancashire. Also how much to pay? I'm geusssing at £500-800? I've found this place here: http://www.geartorque.co.uk/ So unless anyone has any decent ideas i'll probably take it there,i've asked for a quote. Thanks for reading. -
Has anyone got a front wiper spindle/linkage to hand and can measure the diameter of the shaft that passes through the plastic? I have an idea regarding getting rid of the play in mine which hopefully will alleviate the juddering and slowness and want to order some bits, but haven't a spare spindle to hand without taking my daily driver apart..!
-
Hi All I'm going to have a got at refurbing my tailgate badges and quarter badges so though I'd ask all you chaps for any info or tips you might have. I done a set about 14 years ago using a can of red and a can of matt black paint and a few hours of painfully slow masking up. They turned out ok for a cheap run about but I'm now hoping for something that looks a little more OE. I'm guessing plasticare will be the way to go? How did you do yours?