Jump to content
  • Welcome to 205GTIDrivers.com!

    Hello dear visitor! Feel free to browse but we invite you to register completely free of charge in order to enjoy the full functionality of the website.

mrfirepro

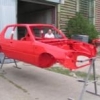
[Car_Restoration] My 1989 205 1.9 Gti Restoration Project

Recommended Posts

Andy_C

Second David @ Uptons. Top chap and second generation trimmer. Does a lot of high (very high) end classic cars.

Share this post


Link to post
Share on other sites
Juttie205

have pm you about template

Share this post


Link to post
Share on other sites
mrfirepro

Ran into a little problem today and I'm all out of ideas.....


Finally have the last few bits of trim to fit (drivers side cubby hole and steering column cowl) as I hadn't fitted the top section of the steering cowl I decided to drop the steering rack to fit it. All finished nice and neat, dash finally complete.


Turned the ignition on and noticed the only light that come on was the battery symbol, Usually iirc the stop and the oil pressure and water temp lights also come on.


Bugger, so stripped the dash down...again.... to take the cluster out as I suspected a connector had come loose. well after playing with the thing for three hours, checking as many connectors as possible, all fuses, I'm all out of ideas, so as usual I'm resorting to you guy's for help...any ideas?

Share this post


Link to post
Share on other sites
Rjuhar

You just have to love this project... I'm glad I have contributed at least a small bit (althouh considering all the new ORIGINAL bits that went into this car I quite doubt it will stay there for long)


The only idea about the cluster lights would be drained battery.

Share this post


Link to post
Share on other sites
mrfirepro

Thanks Gregor,


Had a few bits from you, always good.


Checked battery under load, it was all OK,


Initially it was obviously an earth point for so many things not working, I believe the cluster is earthed left hand side steering column, I've got a new connector and all earths check out fine, then even checked that there were earths on the cluster. so all out of ideas. I see two options...


1. Try another known good cluster...anyone got one they can lend me.


2. Completely strip the dash out(everything) so I can get to all the wiring. Trying to avoid this as every part is unbroken.


Help..... :unsure:

Share this post


Link to post
Share on other sites
james_pug

I have a few spare instrument clusters you can try.

Share this post


Link to post
Share on other sites
jackherer

Check the brown multiplugs in the drivers footwell. The alternator, oil pressure and water temp signal are all on the same plug so the fact your battery light works means it probably isn't that but it's worth a look anyway IMO.

Share this post


Link to post
Share on other sites
mrfirepro

Checked the cluster this morning and it's all working normally, so going to leave it a few days before putting it all back together again, thanks for everyone suggestions...

Share this post


Link to post
Share on other sites
Rock Lobster

I pinched a couple of cable between the rack and its mounting Paul when I was refitting once, might be worth a look if you haven't already. I would by mind that template too buddy if you can help me out?!

Share this post


Link to post
Share on other sites
Anthony

Turned the ignition on and noticed the only light that come on was the battery symbol, Usually iirc the stop and the oil pressure and water temp lights also come on.


Bugger, so stripped the dash down...again.... to take the cluster out as I suspected a connector had come loose. well after playing with the thing for three hours, checking as many connectors as possible, all fuses, I'm all out of ideas, so as usual I'm resorting to you guy's for help...any ideas?

Those three lights are all triggered by the oil pressure switch on the engine.


Unplug the wiring connector from that and ground it against the engine block - the lights should come on.


If they do, the switch is playing up, and if they don't, it'll be a wiring or cluster issue.

Share this post


Link to post
Share on other sites
mrfirepro

Thanks Anthony,


I thought there must be a common item, really happy it's one of the easiest sensors to get to as well.... :(


Will do a wiring check all the way back just to make sure, as the sensor is new.


On the boot carpets, I've got some felt left (maybe I can make another 4) if you want to make a contribution to this site and arrange collection, I'll happily send them out on a first come first served basis until the felt is gone.

Share this post


Link to post
Share on other sites
mrfirepro

The missus has been away this weekend so, have got a few things out the way like dying the headling in the bath...hope she never reads this...


The problem with the instrument cluster has gone away, have fitted one that Miles was selling.


All the photos for this update are here. http://s1238.photobucket.com/user/mrfirepro/slideshow/205%20projects/25%20jan%2015


This was the best of the headlinings I had..(have no idea how I have come to have three headlings out of two cars...spooky...


P1050708_666x500.jpg


this was after a clean, it looks better in this photo than it actually was.


Decided to re-colour it with this..


P1050831_375x500.jpg


Really pleased with the end result as it's now all one consistent colour.


P1050828_666x500.jpg


P1050832_375x500.jpg


It's not really that dark, just my rubbish photography


Close up for colour


P1050833_666x500.jpg


My original plan was to keep the headlining skeleton fixed to the sunroof, stick doubled sided tape to it and then attach the headlining, in the end I removed the skeleton and fixed it to the headlining out of the car. I hindsight there was absolutely no need to separate the skeleton from the headlining. The headlining is now fitted and it all worked out well.


Next job was to try and refurbish the coin tray, after asking on here http://forum.205gtidrivers.com/index.php?showtopic=162661&hl=%2Bcoin+%2Btray, I went with Jackherer's suggestion and bought this http://www.ebay.co.uk/itm/DIY-FLOCKING-KIT-DARK-GREY-VW-CAMPER-HONDA-NISSAN-FORD-RENAULT-/251793066323?


P1050763_666x500.jpg


before


P1050755_666x500.jpg


after removing the old finish


P1050760_666x500.jpg


during flocking


P1050764_666x500.jpg


P1050826_666x500.jpg


Finished product installed


P1050775_666x500.jpg


P1050776_666x500.jpg


Next job was to install the air horns from this thread http://forum.205gtidrivers.com/index.php?showtopic=162234&hl=


Thanks Ashley for arranging the group buy..


P1050838_666x500.jpg


Straight forward install, replaced the horn fixing bolt with a longer stainless steel one, drilled the bumper bracket and fixed the whole thing through the bracket.


Final little job was to install the wing mirror internal parts


P1050801_666x500.jpg


Also looking for these clips, have looked through the clips section of SB but there doesn't seem to be anything matching...any ideas


20150117_133425.jpeg


Have found something very similar to this clip but it's a few mm longer..


also this clip..


P1050788_375x500.jpg


P1050789_666x500.jpg


that's it for now...


  • Like 2

Share this post


Link to post
Share on other sites
ATK

Paul,I think i have a bag of 50 of those white clips, send me your address and I'll stick 10 in the post FOC....

Share this post


Link to post
Share on other sites
lightflow

Quick work on the horn! I think mine will be a few months before it's fitted. Have you given it a go yet? How does it sound?

Share this post


Link to post
Share on other sites
mrfirepro

Alex - Thanks, will drop you a PM


Ashley - LOUD...very bloody LOUD

  • Like 1

Share this post


Link to post
Share on other sites
timoth123

Looks good Paul as always!!

I really should check in here more often for the updates.

(Keep putting my update off)


Hopefully your horn sounds abit more manly than mine after fitting new components.

Sounds like one of those squeezey bike horns a clown might have plumbed through a mega phone!


Also would you be willing to do another coin tray?? For cash monies of course? ;)

Edited by timoth123

Share this post


Link to post
Share on other sites
mrfirepro

Looks good Paul as always!!

I really should check in here more often for the updates.

(Keep putting my update off)


Hopefully your horn sounds abit more manly than mine after fitting new components.

Sounds like one of those squeezey bike horns a clown might have plumbed through a mega phone!


Just had an image in my head with you at the wheel, rouge on your cheeks and a giant red nose and silly hat........ :lol: :lol: :lol:

Share this post


Link to post
Share on other sites
timoth123


Just had an image in my head with you at the wheel, rouge on your cheeks and a giant red nose and silly hat........ :lol: :lol: :lol:


Ha! Now that's a look!

Edited by timoth123

Share this post


Link to post
Share on other sites
mrfirepro

Hi Tim,


Could do another tray, only got enough stuff to do another 500 or so.... :lol:


send it over.

Share this post


Link to post
Share on other sites
mrfirepro

the photos from this update are here http://s1238.photobucket.com/user/mrfirepro/slideshow/205%20projects/1%20feb%2015


The car is all virtually finished.


I still haven't found a trimmer that will re-build the front and rear seats, I did finally manage to get a quote from one but at £3k I thought he was over priced.


Just waiting for some clips and the two last interior trim panels can be fitted.


P1050867_666x500.jpg


P1050861_666x500.jpg


P1050862_666x500.jpg


Fitted the newly dyed headlining and interior light trim


P1050890_666x500.jpg


fitted Tom Fenton's stainless steel rear valance ties


P1050869_666x500.jpg


I think Tom sent some rivets forged in the fires of hell, eventually resorted to using a clamp on the rivet gun


P1050871_666x500.jpg


P1050876_666x500.jpg


After nearly a year of looking, I found a rear parcel shelf, used the same fabric dye as the roof lining and I think the end result was pretty good


P1050906_666x500.jpg


lastly was catching up with a few jobs that weren't right the first time


renewed the respray kit on the passengers door, this time without the optional bubbles


P1050883_375x500.jpg


It had always bothered me that the sunroof trim never really fitted flush all along the roof and when taking the trim off, some of the fixing legs were a little out of shape. I think the problem is that the sunroof retaining screws are a fraction too low, my solution was to install a second fibre washer which seemed to work well. Perhaps my aftermarket fibre washers are thinner than the original OE ones???


P1050880_666x500.jpg


P1050878_666x500.jpg


now much better along the whole length


P1050882_666x500.jpg


so whilst the interior is away I plan to install a spare drivers seat and get it on the road.


I also need to set up the steering suspension and tracking - any advice on doing this myself would be good, if it is possible to DIY?


Was thinking of asking a local garage to re-check all critical nuts and bolts are properly torqued prior to the MOT


Any advice on getting the car on the road/running in would be good


There is one electrical issue with the side lights, does anyone have 4 of the spade connectors for the side lights or know the part number as they are all knackered.


When that's all done it's back to the body shop to fix a few little marks that have been done during the restoration.


Share this post


Link to post
Share on other sites
Tom Fenton


fitted Tom Fenton's stainless steel rear valance ties


P1050869_666x500.jpg


I think Tom sent some rivets forged in the fires of hell, eventually resorted to using a clamp on the rivet gun


P1050871_666x500.jpg


P1050876_666x500.jpg


Ha ha ha!


They are stainless steel rivets hence the comment on my website that you need a good quality rivet gun! The reason for that is that Peugeot used an aluminium alloy rivet here, which corrodes against the steel and rots through, hence why the valance supports fall off the car and go missing.

The stainless rivets are a bit harder work to set, but should last forever.

Share this post


Link to post
Share on other sites
jackherer

This link has the part numbers for the electrical connectors nicely laid out - http://www.ryanmoore.comule.com/


I think I have some, PM me your address and I'll post some to you.


What style seats did it have originally? Being a G it is right on the changeover.

  • Like 1

Share this post


Link to post
Share on other sites
Tom Fenton


P1050871_666x500.jpg


Being ultra picky here, but the rubber boot as standard pushes over the wiring, with the vent pointing downhill. E.g. the wiring from the plug doubles back on itself then the rubber pushes over the lot. Also on mine, the wiring ran the other side of the valance stay. :D

  • Like 1

Share this post


Link to post
Share on other sites
mrfirepro

Kieran - I'll PM you my address, thanks for that. I've got the two tone grey with red stripe. I'm trying to get the seats remade but reuse only the central fabric bit.


Tom - You be picky mate, the more I can get absolutely right the better the car will be, not sure I get the bit about doubling back :unsure: . Will move it the other side of the stay.

Edited by mrfirepro

Share this post


Link to post
Share on other sites
Juttie205

love this build gives me a target for mine.

Share this post


Link to post
Share on other sites

Create an account or sign in to comment

You need to be a member in order to leave a comment

Create an account

Sign up for a new account in our community. It's easy!

Register a new account

Sign in

Already have an account? Sign in here.

Sign In Now

×