
Introduction:
This guide is meant to lead you into the world of "Photoshopping" - using Photoshop to manipulate pics of cars. First you need to grasp the most basic function of Photoshop. Almost all actions require the selection of a part of a picture. There are a couple ways to do this.
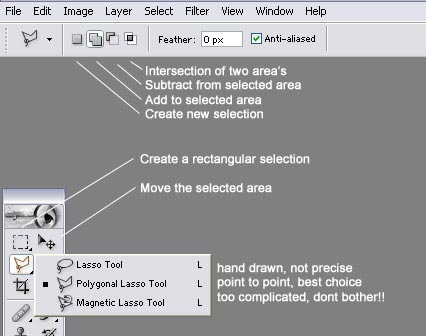
tools for selection explained
1. The square dashed box. Selecting this tool will allow you to draw a rectangle on your picture. Areas in that box will be altered (assuming the settings are to add to the selection). It is possible to hold the button, which will also bring up an ellipse, single row and single column choice. To be honest, you will probably never use this tool as almost nothing is ever a uniform shape!
2. The second tool is called the magic wand. I haven’t shown it in the capture because its pretty vague, and is not as accurate as using the lasso tool’s. If anyone wants to try it, the button to select it is to the right of the lasso tool button (hidden above).
3. The lasso tool’s are the best, and most accurate to use for selecting areas you wish to modify. Standard setting is the normal lasso. This requires hand drawing, I don’t care who you are, you will never get a straight line with this thing, and it really shouldn’t be necessary. The polygonal tool is by far the best tool to use. Basically when you click once, it becomes a starting point for a line, a second click will draw one straight line and start another. As above, don’t bother using the magnetic lasso, it never does what you want to do, unless you’re a Jedi perhaps?
When you join up the points using the lasso tools, the lines will be dashed showing the area selection. If you select the button to add to your current selection in the top toolbar, you can draw as many areas as you like connecting them up, giving your hand a rest from precise movements, and take your eyes away from the screen every now and then, it cant be good for anyone to look intensely at a screen for prolonged periods!
I have also highlighted in the capture, the move tool. This is also used a lot when ‘choping, such as if you select the shell of a car with the lasso tool, then copy & paste the selection, then move the selection down a touch to give the car that lowered look.
Top Tip: Select some of the background as well as the car when lowering a car, otherwise you will have 2 rooftops. Try it and see what I mean!
The job:
Right then, most people want to know how to change the colour of their cars, or what their car would look like with anthracite wheels etc, so this is how to do it. Take your starting picture, this isn’t the best example, but it’ll do for the purpose of demonstration. When choosing pictures, try and find high resolution examples, they are much easier to work on.
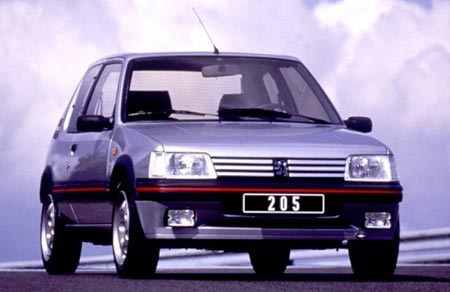
a generic pic of a silver 205 GTI
First step is to select the areas which you want to modify, in this case I’m going to change the colour of the car. Using the polygonal lasso, I’ve selected as best I can, the car’s shell. Sometimes it’s best to zoom in on the picture to get a more precise selection. This is how it’ll look with the body lasso’d.
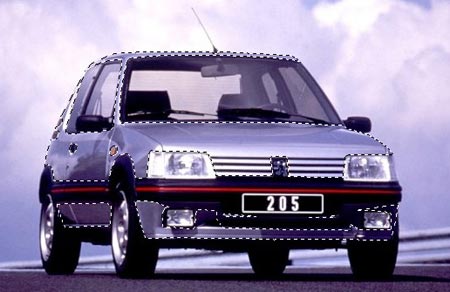
bodywork pixels selected
The following is the most important menu a beginner at Photoshop needs. A myriad of options to edit images awaits the keen ‘shopper. My only advice is to play with everything. There are several ways to edit colours, but the colour balance toolbar is the one I use most often.
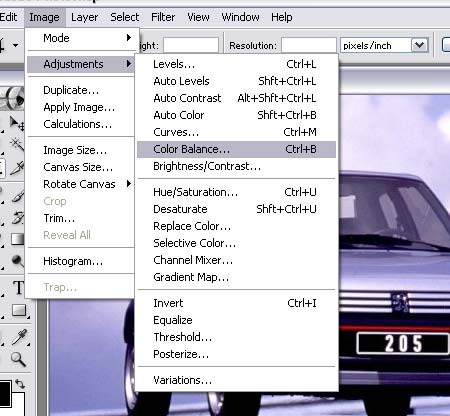
contents of Image menu
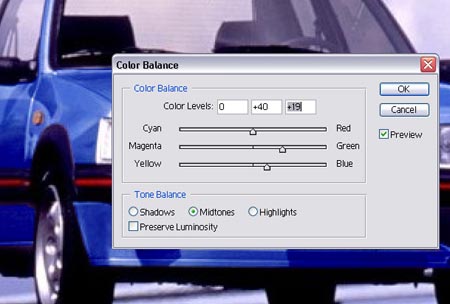
Open the toolbar and you will have a similar screen in front of you. Change the midtones first, and then use the shadow and highlights to touch up the colours. Also play with the luminosity setting, generally I keep it ticked but for this picture I decided against it.

setting the Colour Balance
Top Tip: when using darker coloured cars as a starting point, it may help to desaturate or adjust brightness/contrast before changing colours, this allows a much bigger spectrum of colours that you will be able to change to.
Now everyone knows Sorrento Green is the best colour :-P but this time I went for a Miami blue-alike, so I’ve used the settings to change the colour as you can see above.
The conclusion:
In total ive changed the cars colour, lowered it a bit and made the wheels fill the arches. The wheels are gold because I think it looks the badgers nadgers with these, I’ve also changed the red strip to a chrome look and converted to a 3bar grill. It’s a skill, but it doesn’t take much to learn the basics!
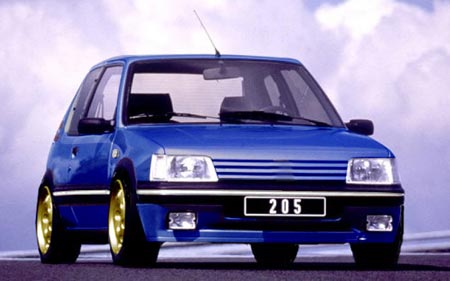
the finished product