

Introduction:
To me, removing the gearbox and refitting it with the engine in the car sounded impossible and very tricky, but as it turns out its not that bad! Very useful if you need to swap a gearbox or just fit a new clutch. This is something possible on your own but having someone help you makes a few bits much easier, namely the refitting of the box!
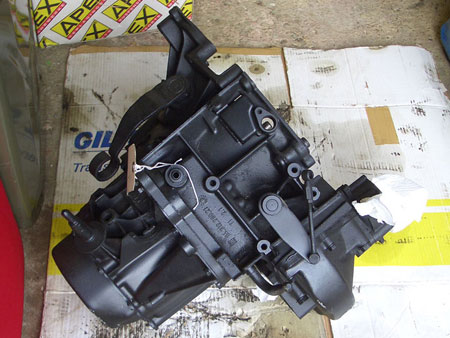
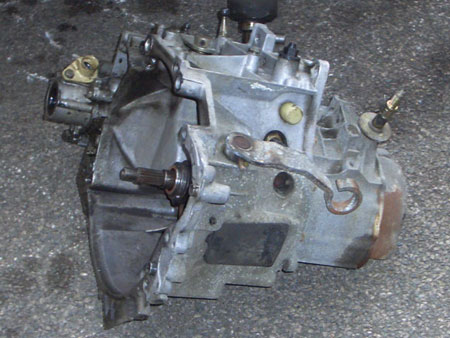
rebuilt be3 gearbox (with quaife lsd)
Tools/Parts Required:
- Trolley Jack
- Axle Stands
- Socket Set
- Spanners
- Oil Drip Tray
- Gear Box Oil (any good 75W80 or 75W90)
The Job:
1. First thing is to loosen the wheel bolts (or nuts if you have a stud conversion) and get the car jacked up, then safely on axle stands. You need the car fairly high so you can get underneath it and the gearbox can come out from under the car.
2. With the car jacked up drain off the gearbox oil from the drain plug, thats the plug at the back of the gearbox at the very bottom. Its quite close to the subframe so although it has a square size socket in there for the standard sump plug key there isnt any room to use it! Fortunately Peugeot decided to make this drain plug with a nut style shape so just get a spanner to it and remove. (worth pointing out that some people dont bother draining the gearbox this way and just let it empty when the drive shafts are removed, I find draining the box a much cleaner method!)
3. While the gearbox drains remove the wheels. We now need to remove the drive shafts from the gearbox. We dont need to completely remove the driveshafts from the car so thats why we havent touched the big driveshaft nut by the hub. I find the easiest way to remove the driveshaft is to release the hub from the wishbone balljoint. Undo the nut (16mm) and tap out the bolt, then either using your weight or a leaver pry the wishbone away from the hub (you may also need to use a mallet to tap the wishbone free). This can be done to both sides, but removing the driveshafts themselves differs slightly each side.
Warning: You may have great difficulty pulling at least one driveshaft out of the differential if you have managed to explode the diff (through lack of oil) they seem to stick and can be a real pain!
4. The passenger side driveshaft is simple as once youve dropped the wishbone away from the hub you can just give that driveshaft a gentle tug and it will come straight out of the gearbox. Move the whole strut assembly with driveshaft over a little and make sure not to damage the end of the driveshaft (I usually wrap a plastic bag around the end to stop dirt etc. sticking to it).
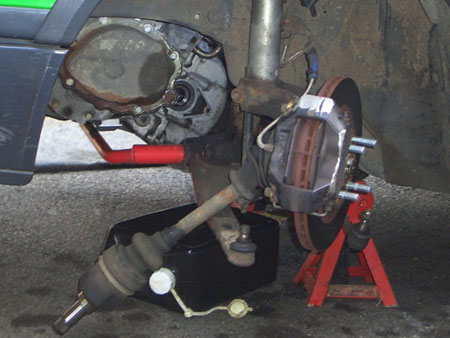
oil drained and driveshaft removed
5. The drivers driveshaft is a bit more fiddly as there is a bearing assembly housed in the rear engine mount that the driveshaft is bolted to. Slide under the car until your looking up at the rear engine mount. To the left of the mount you will see 2 threads sticking out with small nuts on. You need to undo those nuts (11mm) about an inch or so (no need to remove them, just make sure they are almost at the end about 3-4mm). Take one of the threads in your hand, push towards the housing and then rotate about 90 degrees. The bolt is basically like a hook acting on the centre bearing and your spinning the hook off the bearing allowing it to be removed. Repeat this with the other thread. You should now be able to release the driveshaft from the gearbox. You may need to give the centre bearing a tap with a hammer and screwdriver or similar as if they havent been out in a long time they can seize in there a little. Once out of the gearbox try and hold the assembly out of the way, you wont be able to move it that far as its so long.
Warning: Whatever you do dont just yank the driveshaft from the hub end without releasing the centre bearing, you will simply pull the driveshaft apart. If it does come apart then you will need to act very quickly. There are 3 large bearings each supported by small roller bearings. The large bearings can fall off very easily, allowing the roller bearings to also drop off. They can be rebuilt, but its incredibly fiddly! The shaft will go back together again, but you need to slowly work it in to get the right angle hitting it doesnt work.
6. Now the driveshafts are out of the way its time to work from the top of the engine. Depending on how you have your engine bay laid out and what filter setup you have, remove the air filter and AFM. Then disconnect and remove the battery. With the battery removed you will see the top gearbox/engine mount.
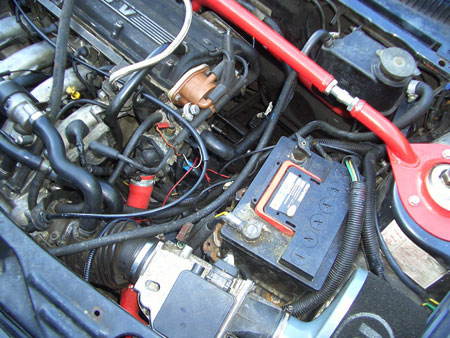
remove the battery and clear some space to access bolts
7. On top of the gearbox is usually a mess of wiring etc. so just move that out of the way as best you can. You now need to tackle undoing the starter motor. This is located just to the front left of the gearbox under the inlet manifold. Its a pain to get to but its possible. We dont need to remove the starter completely, just remove the bolts holding it to the gearbox. There are 3 of these and they are normally Allen Head bolts. They are very long bolts so keep undoing until you can remove them.
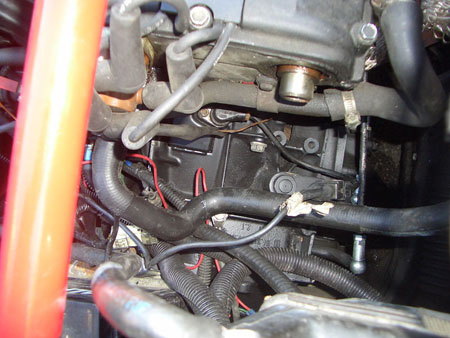
remove items connected to gearbox
8. Still working from the top of the gearbox, remove the following items:
- Reverse Switch Plug
- Crank Sensor Wire (if fitted)
- Speedo Cable (into the diff casing)
- Gear Shift Rods
- Clutch Cable
- Earth wires
9. With all of those bits disconnected from the gearbox your now left with just the 4 main bolts holing the gearbox to the engine. These are either allan bolts (as starter motor) or 16mm. Before removing these now is a good time to get the trolley jack under the gearbox and just support the weight. The gearbox wont suddenly fall as it still has the input shaft to rest on but its better to be safe than sorry.

support the gearbox with a trolley jack
10. Of the 4 bolts holding the gearbox to the engine, 3 are located at the top and 1 is located at the bottom near the diff housing. As long as you have the weight of the gearbox on the trolley jack you can remove all 4 bolts with no worries. Sometimes the rear of the top 3 bolts has a plate bolted to the gearbox over it, so if you cant locate the 3rd bolt there then its probably under that plate!
11. The 4th bolt is under the car towards the back near the diff housing on the gearbox. This bolt goes the other way from the 3 top bolts, through the back of the block into the gearbox housing (the top bolts are through the gearbox housing into the block). Remove this 4th bolt.
12. While your under the car check to see if you have a flywheel cover plate fitted (you should!). If its there remove it as it will prevent the gearbox being moved.
13. You now have the final item to remove, the gearbox/engine mount thats under the battery tray. Ensure the gearbox is supported and remove the bolts from the mount (one big one and two smaller ones).
14. With all these now undone this should now release the gearbox. Dont be shocked if it doesnt move. You now need to start wiggling the gearbox and you may need to use a bar to pries it away from the block. Remember that at this point its still resting on the input shaft.
15. To fully remove the gearbox you now just need to do a combination of wiggling, jiggling, pulling, pushing and general sweating to get it out. Its a bit fiddly but youll get there in the end. The problem is getting the topmount-shaft beneath the wing whilst getting the diff housing to miss the subframe. You may need to twist it a bit to get it out! Just remember to use the trolley jack to lower the box a little at a time once its free of the input shaft.
be3 gearbox now removed from car
16. With the gearbox now off the car you have easy access to the clutch should you need to change that (indeed that may be the reason for removing the box!) If so then please see the Clutch Change Guide.
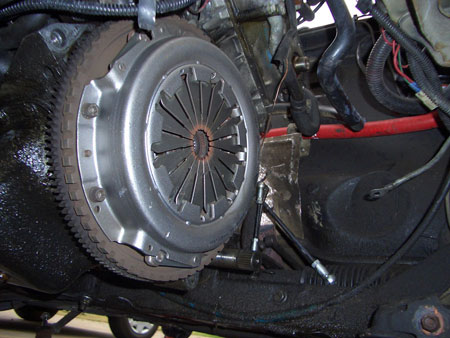
clutch is now easy to change (guide here)
17. Refitting the gearbox to the engine really is the reverse of removal but here you REALLY need the help of someone else. To get the gearbox back up and mated to the engine get it sat back on the trolley jack and slide it in under the car, then either with some rope around the gearbox, or if you have long arms grab the gearbox from the top of the car and lift up (watch your back doing this). If you have a helper get them under the car (carefully!) to help guide the gearbox up and in. The gearbox needs to be twisted (diff upwards) to make it easier. Your aiming to get the input shaft beginning to slide back into the engine, as soon as its taken a couple of inches the heavy work is done! If you have an engine hoist then you could use this instead of a helper.
18. Once the input shaft is in you will now need to locate it fully. This may take a few minutes of jiggling the gearbox around as you need to rotate it left and right around the input shaft to get the splines to match up. Youll know when its right as it will just locate that last inch or so. Wiring always gets in the way at this point. Sometimes you may get the mount into place before. If so then you can gently jack up the engine to allow the box to locate fully.
19. With the input shaft located fully you now go round and fit the 4 main gearbox bolts and the gearbox/engine mount. Everything else that youve removed also needs to go back on, make sure you dont forget anything!
20. Once the driveshafts and wishbone ball joints are back together only fit the drivers side road wheel at this time. This is for a nice little trick I use to fill the gearbox up to the correct level.
21. Ensure everything is connected and done up nice and tight etc. then remove the axle stand from the drivers side of the car and lower that side down. Now take the trolley jack to the passenger side and jack this up, remove the axle stand and carefully lower the jack until the car is level. This now gives you access to the gearbox filling point with a level car as the 205 gearbox is a drip fill box, i.e. once the oil starts dripping out of the filler hole its full.
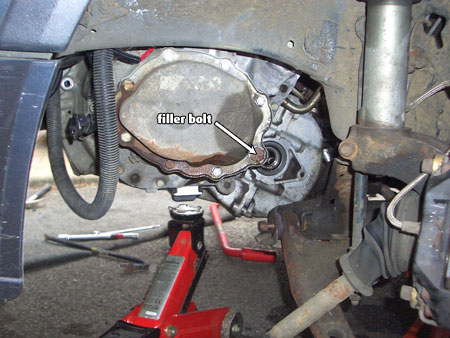
gearbox filler location
22. The filling point on the BE gearbox is on the very end casing as you look at the gearbox through the passenger wheel arch. There is a large bolt in the bottom right hand corner as your looking, this is the filling point. Remove the bolt, clean off the magnet on the bolt and start pouring in the gearbox oil. Its a bit fiddly but I use a funnel with a long nozzle (small gear oil containers have extensions that fit). Its a good idea to put your oil drip tray under where your working as you will drop some oil. Continue to fill the box making regular checks to see if the oil is dripping back out yet. Once is starts dripping your done. If you go a bit too full let it pour back out of the box until it slows to a drip. Refit the bolt and your gearbox is now full of oil.
23. Jack the car back up a little then refit the wheel. Lower the car, tighten up the wheel bolts (or nuts) and your done!
24. As there is a reasonable amount of force exerted on the gearbox its a good idea to check the main gearbox bolts again after a few days driving or a few hundred miles. They have been known to come loose so keep an eye on them. If this happened you will notice that you get strange whirring sounds and a random clutch bite point! Threadlock or new bolts will solve the problem.