

If you are going to attempt this:
This guide is written on the assumption that you will be working on a gearbox that has already been removed from the car. I believe it is possible to fit the Quaife ATB differential without first removing the gearbox but having not attempted it I will concentrate on out of car fitting instructions.
If you need instructions on removing the gearbox, please check the Gearbox Swapping Guide.
Please print these instructions and read them carefully. Make sure you are working in a clean environment and be careful not to contaminate any gears or components with grit. Make sure you have all the relevant tools and use plenty of thread lock compound on all bolts. These instructions are intended as an accurate guide. If you are not 100% certain of what you are doing consult a specialist.
Introduction:
The Quaife ATB (Automatic Torque Biasing) LSD (Limited Slip Differential) is a direct replacement for the standard O/E differential and is designed to give increased traction enabling your car to accelerate quicker and corner faster.
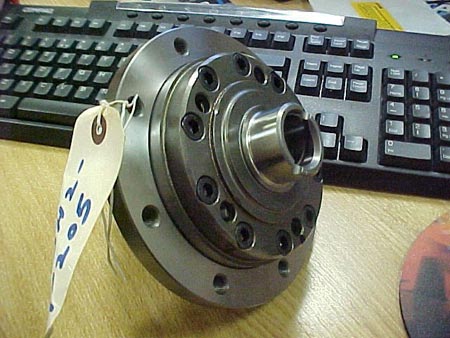
the Quaife differential as it came out of the box
For more information on the benefits of the Quaife ATB please check our forum and Quaife website.
The job:
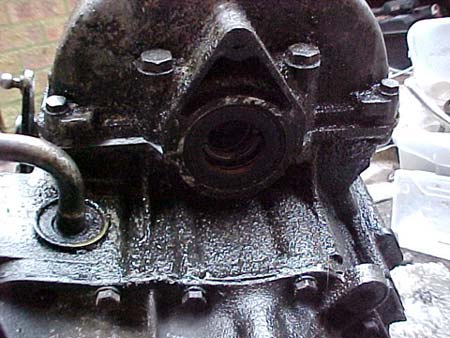
1. The first step is to remove the Speedo drive casing from the gearbox; this is secured by 4 bolts into the side of the diff casing (pictured below). Once removed inspect the plastic Speedo cogs for wear / missing teeth and replace the oil seal (also pictured below), this should just prize out with the use of a screw driver.

remove the speedo drive casing first
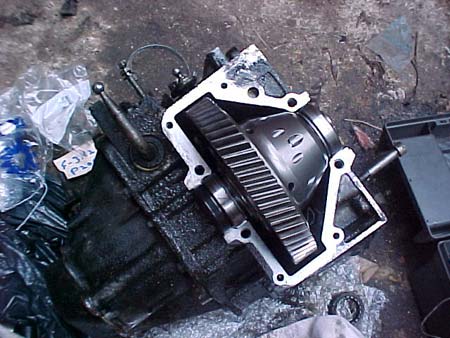
2. With the Speedo casing removed, the next step is to remove the differential casing, this is secured by 4 large bolts and 4 smaller ones (pictured below), once the bolts have been removed the casing should pull cleanly of the back of the gearbox, I have included a picture of the removed differential casing below (note the guiding pin when replacing the casing later on).
then remove the diff casing
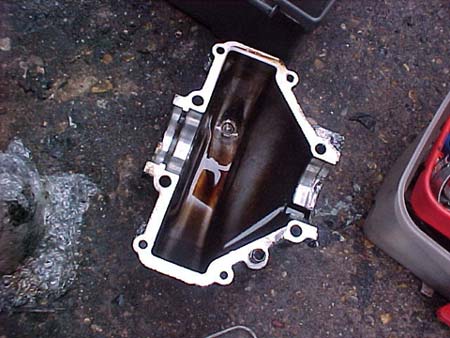
this is how it looks when removed
3. With the casing removed the next step is remove the old differential, it should just pull out, at this point you might as well remove the remaining oil seal at this point.
inferior original differential you don't need any longer :-)
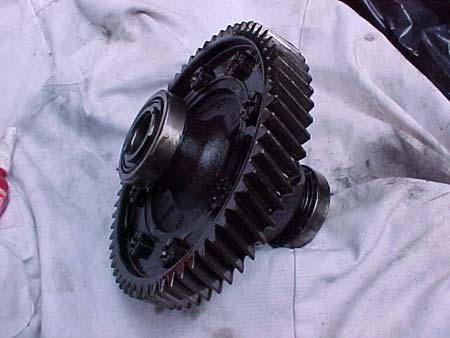
4. Now that the differential is free from the gearbox you will need to remove the crown wheel and attached it to the new differential. To do this I recommend first placing the diff in a vice, wrap the diff in cloth so you do not damage it. You then need to use suitably sized socket to remove the 8 bolts that hold the crown wheel to the differential, take care when cracking these bolts as they are normally very stiff. Clean the bolts and use plenty high grade thread lock when attaching the wheel to the Quaife unit.
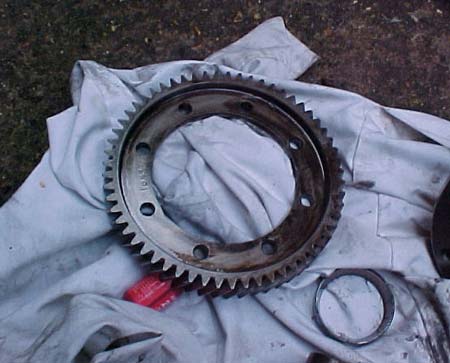
the crown wheel (final drive) now removed
5. Next you will need to fit new bearings to the new differential, these are a standard part and are available from Peugeot for about £25 each (pictured below), apparently it is always good practice to renew these as it is very easy to damage the old bearings when removing them even with a press. To fit the new bearings to the diff you will need to use a suitably sized drift on the inner ring of the bearing and carefully drive the bearing into the end of the diff, this will require some patience and skill as the bearing needs level before it will go on. Use the old diff as a reference of how far down you need to drive the bearings.
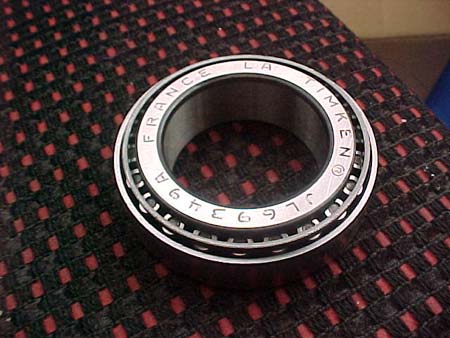
a close-up of a new differential bearing
Quaife ATB differential now succesfully fitted!
6. Once the new bearings are in place you can go about refitting the new differential into the gearbox, this is simply the reversal of the removal (pictured above). Make sure you renew both oil seals, the larger one on the left of the picture and smaller in the end of the Speedo drive casing. I also recommend putting a small amount of oil on the seal to make sure you do not damage it when you replace the driveshaft.
7. Wipe the joining surfaces clean and refit the differential and Speedo casings to the gearbox (again use thread lock on the bolts). And that's it; you have successfully fitted your Quaife ATB differential.