

Legal Disclaimer
The procedures on this page are presented as guidelines ONLY. They reflect particular jobs that were done by myself and were written down from memory as a guide to others who might need to do the same procedure. I make no representations as to the accuracy of the information contained here (please remember that I am not a professional mechanic and that free advice is worth every penny). What you do to your car is what YOU do to your car. I take no responsibility for the results of YOUR actions, lack of common sense, or stupidity.

Introduction
The 205 GTi runs a 19mm Anti-Roll Bar (ARB) as standard and this seems to be the ideal size for the 205 chassis/setup. The ARB runs above the front subframe, held on with 2 clamps, and connects to the Drop Links either side.
Tools/Parts Required
Trolley Jack
Axel Stands
16/17mm Socket
Leaver (big screwdriver or crowbar)
1. First thing is to loosen the wheel bolts (or nuts if you have a stud conversion) and get the car jacked up, then safely on axle stands. Then remove both front wheels.
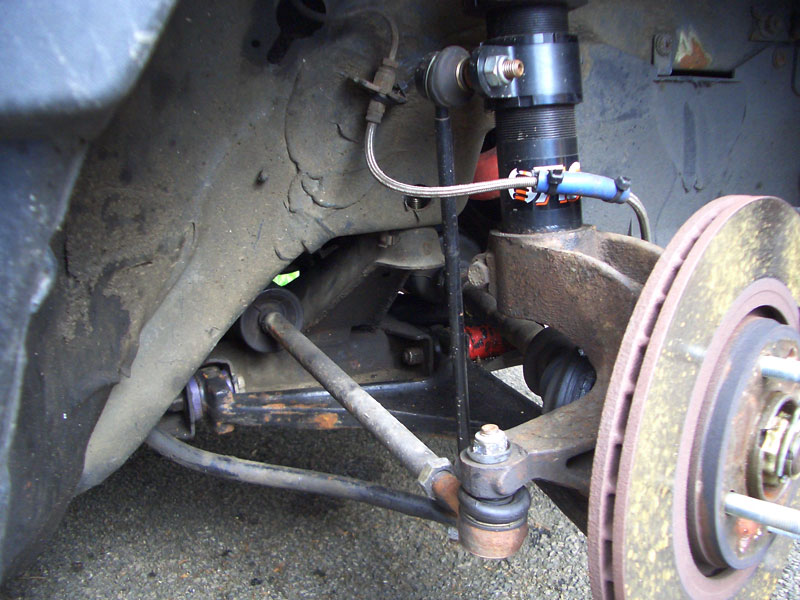
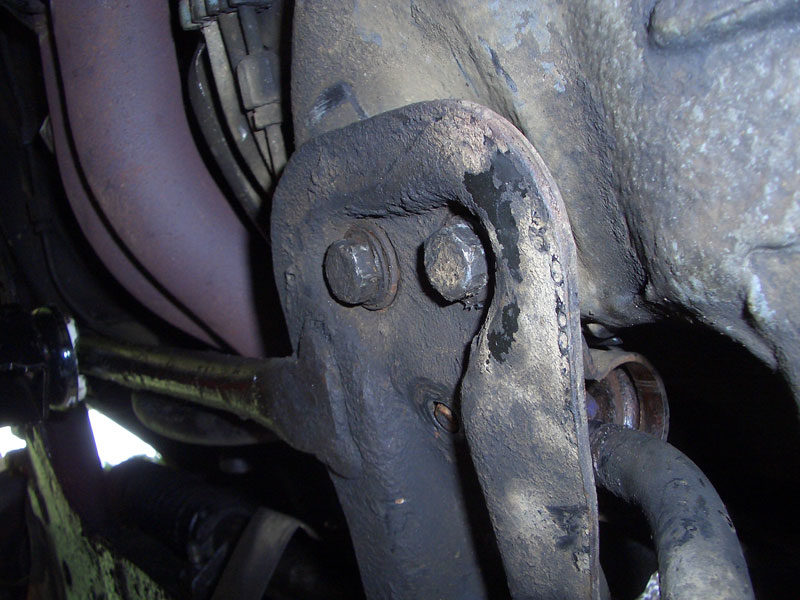
2. Now identify the ARB and where it’s fixed to the car. You will see a Drop Link either side that is connected to the suspension strut and the ARB. If you slide under the car a little you will then see where the clamps are mounted that hold the ARB to the subframe, tight isn’t it! (pic 1 & 2)
3. So lets get on with it… first thing is to undo the ARB to Drop Link nut. If you’ve still got the original Drop Links then the nuts are likely to be 16mm (good old Peugeot!) but if like mine they are aftermarket replacements you will find they use more common 17mm nuts, either way undo them and you should be able to push the ARB down and off the Drop Links. (pic 3)
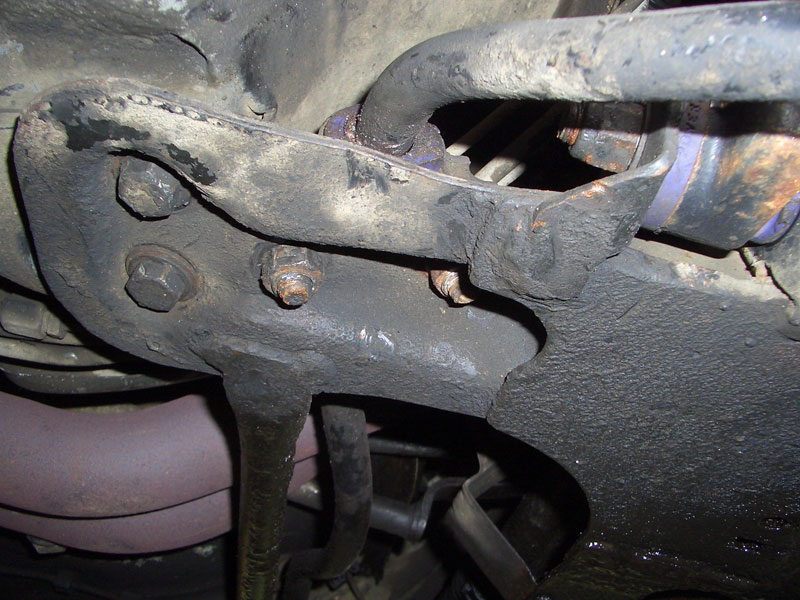
4. With the ARB removed from the Drop Links it’s now free to swing down. Making sure not to stab the ARB in your eye/head slide under the car and with the 16mm socket you can undo the 4 nuts on the brackets (2 each side). With those removed you will immediately see that there is no way of getting the brackets off the car due to the fixed threads. The key here is to remove the rear subframe bolts... sounds scary but it’s not that bad. (pic 4)
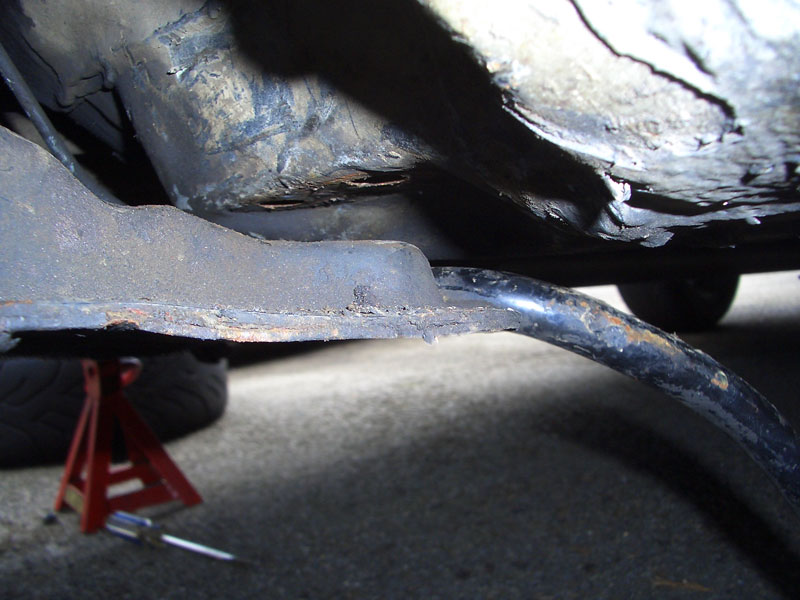
5. Before I removed the bolts I placed a trolley jack under the subframe to prevent it from crashing down complete with engine, or so I thought. Turns out that once I removed the 4 x 16mm bolts and lowered the trolley jack the subframe moved about 1cm and then stayed there. So I ditched the trolley jack and carried on. (pic 5)
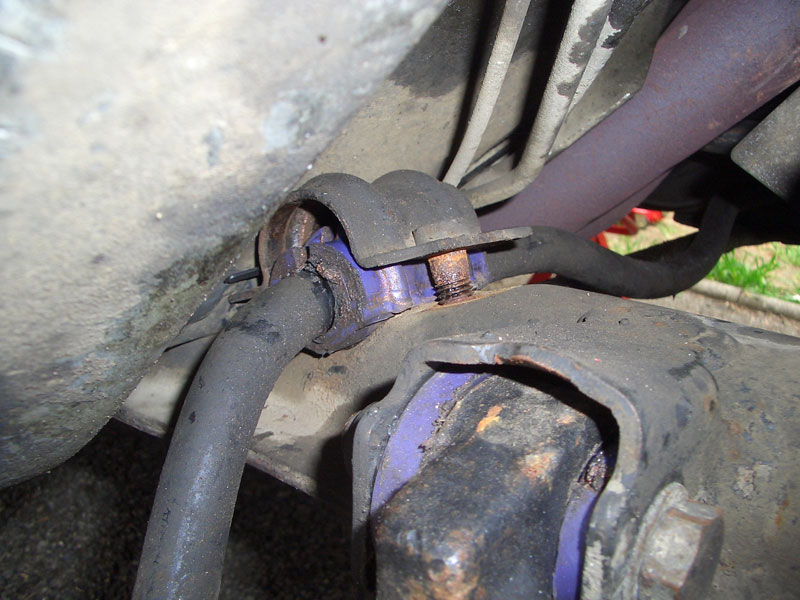
6. With the rear of the subframe now loose you should have enough room to wiggle the brackets out. Once removed you can then take off the ARB bushes. It’s worth point out here that the ARB bushes are sided, with the passenger side (RHD car) having a ‘lump’ on the ARB for the bush to sit over. This ensures that when refitting the ARB it is located in the correct position across the car.
7. At this point if you’re simply replacing the bushes or fitting uprated ones then fit the new bushes, refit the brackets and replace everything you removed in reverse order. A trolley jack will be required to lift the subframe back into position for the bolts to go in nicely.
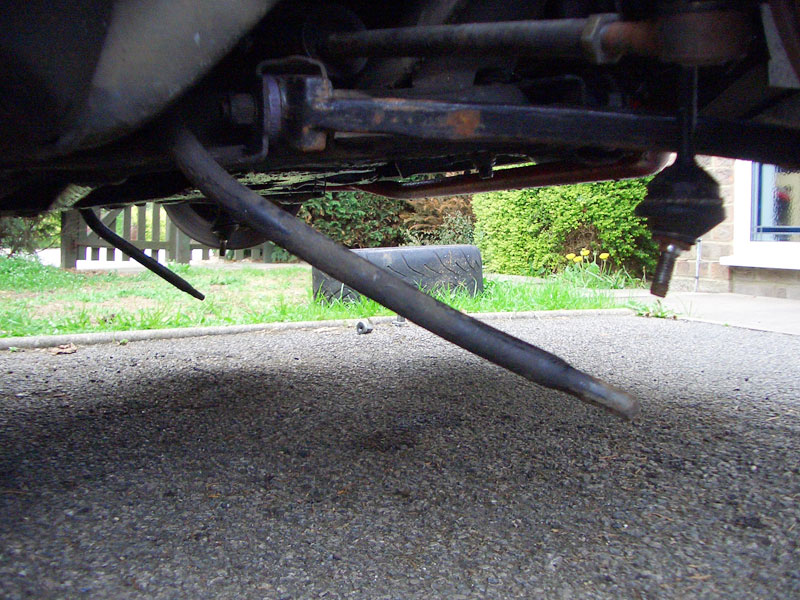
8. Should you wish to completely remove the ARB then you will require a leaver of sorts (screwdriver or crowbar etc.) to help push the subframe down enough to remove the ARB. The subframe will only go down so far so you will need to push the ARB a fair bit to help it past the chassis and subframe. It looks like it won’t go but it will suddenly pop out. (pic 6)
9. I removed the ARB as I was upgrading to a 309 ARB which is 21mm. This isn’t suited to every 205 setup so isn’t recommended. It is, however, worth pointing out that the 309 ARB Brackets are easier to remove/fit as they have a threaded hole that takes a bolt rather than a threaded stud, so you don’t need as much clearance between the subframe and chassis.
10. Refitting the ARB is the reverse of removal. Use a leaver to help push the subframe down enough to get the bar in, just make sure you have the bar the correct way round (see point 6 ref. ‘lump’ on ARB).